Members

Members

  • A member is an associate or a frequent visitor of the institution or the company.
  • Members page displays all the details of members who were added by the admin or User.
  • In this page, admin can edit the existing details of members and add the details of new members into the portal.
  • In Members page, Maximum limit of 20 records can be viewed when admin or user logged in to account.

Click on ‘Members’ Tab.

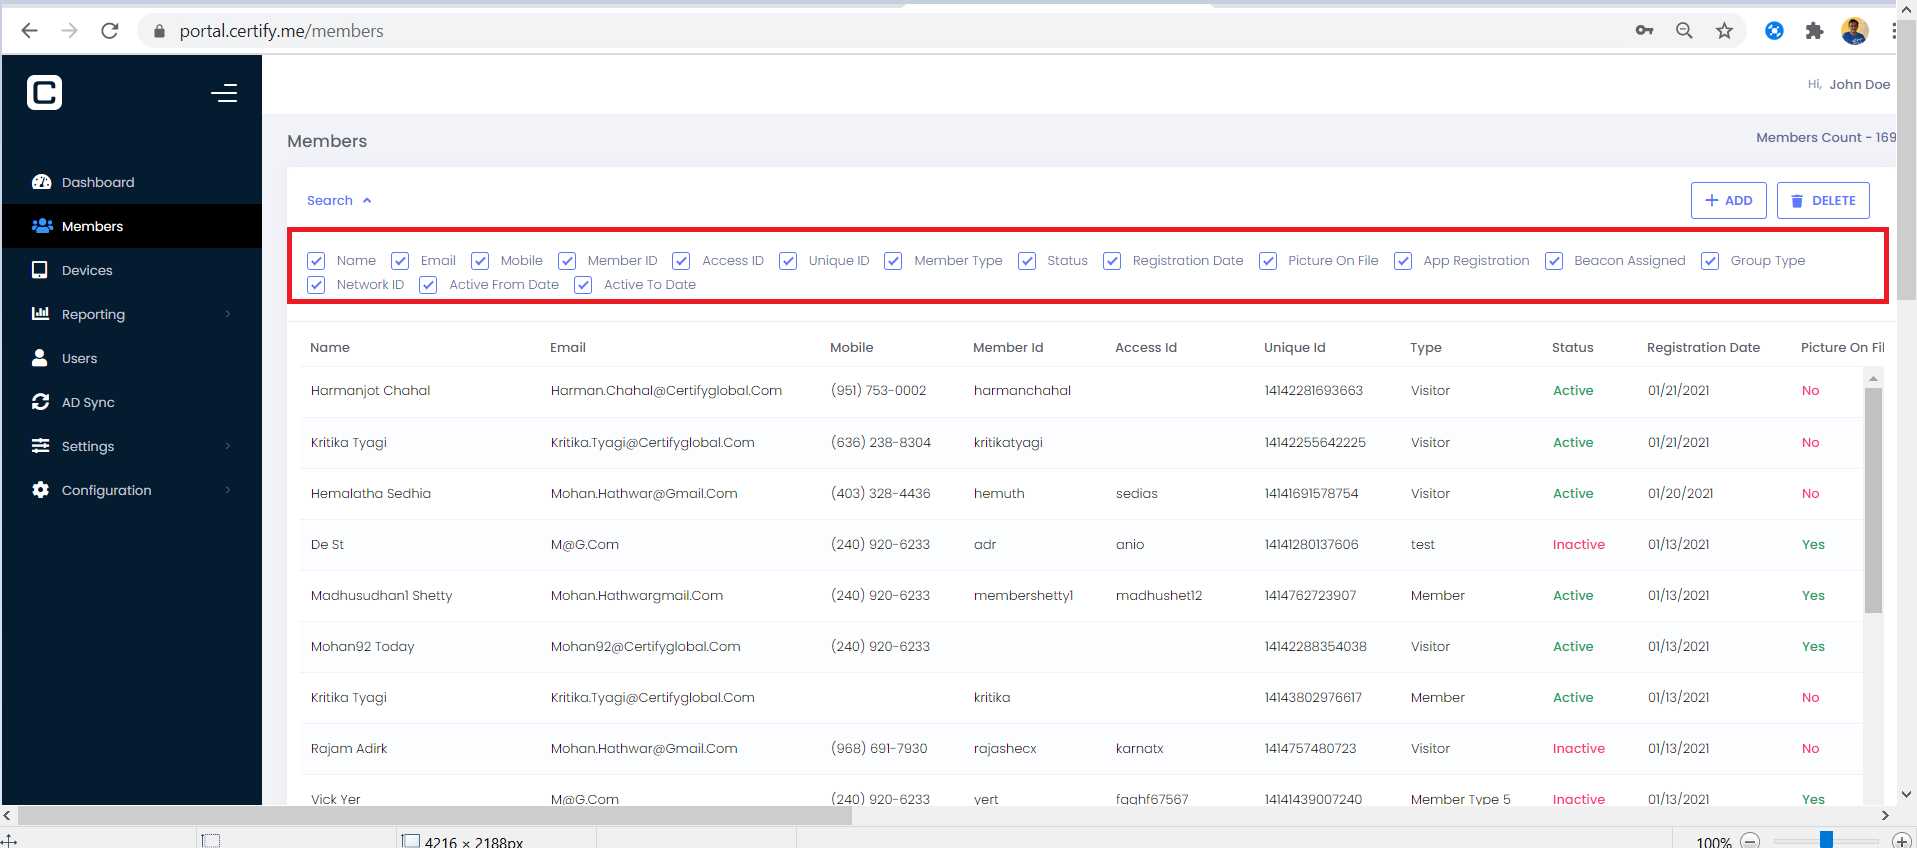
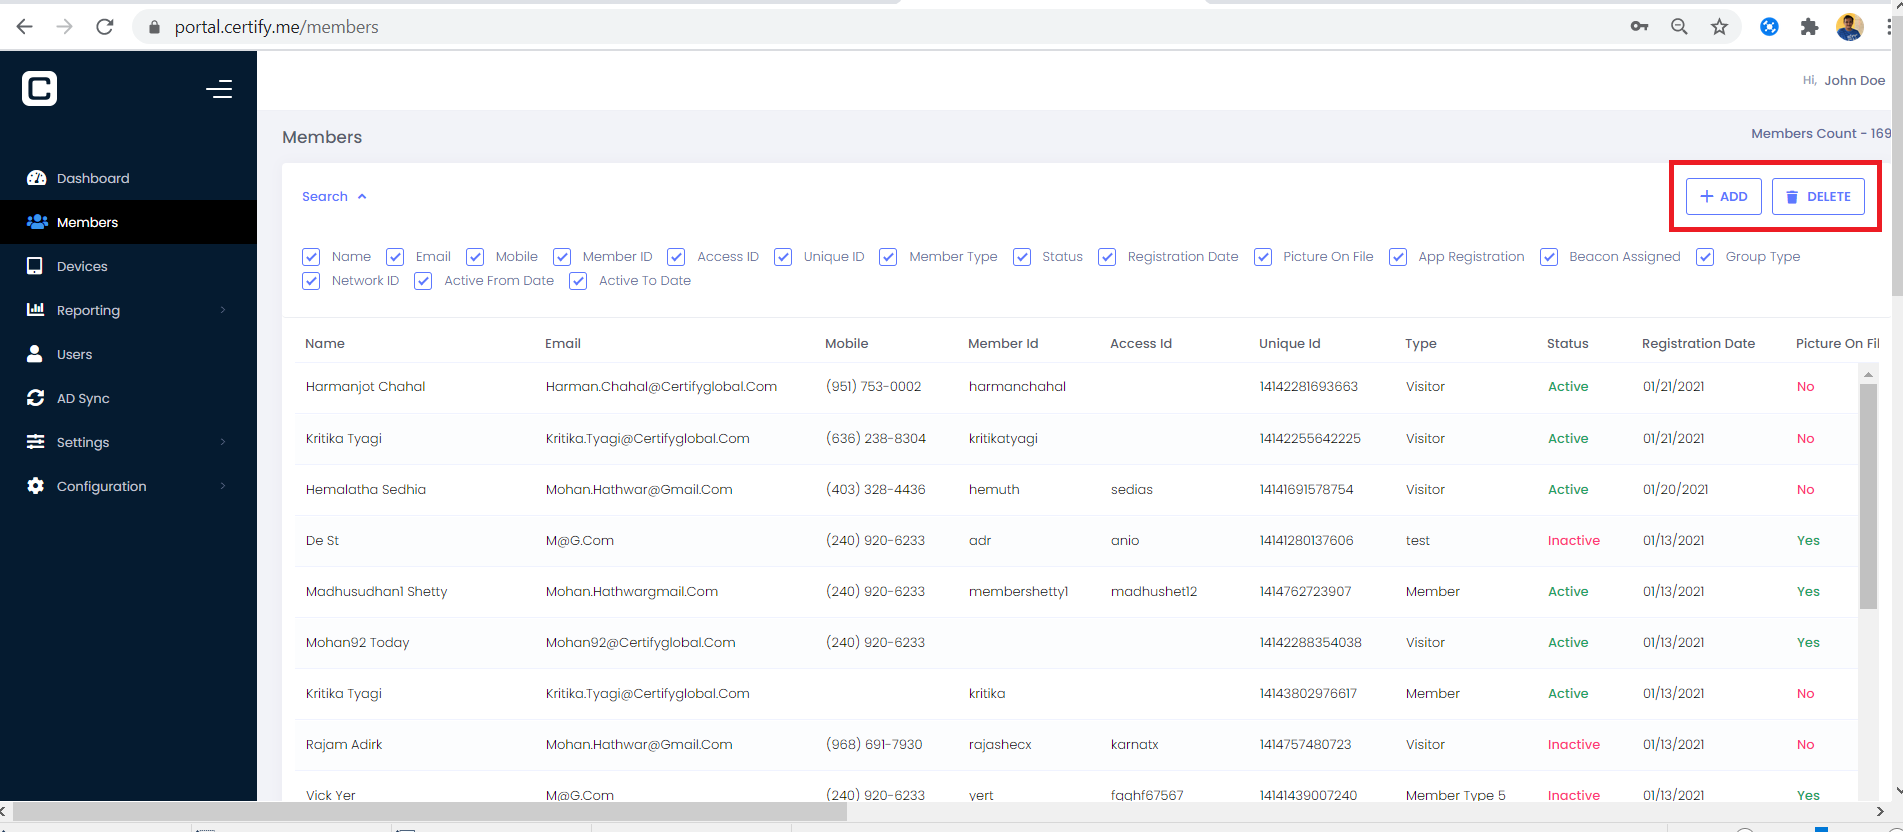
Members management page appears with details of all the members as shown in Figure-1. User can select the column that are required from the custom column menu. The fields available are:
Name: This field indicates the name of the member.
Email: This field indicates the email address of the member. Mobile: This field indicates the mobile number of the member.
Unique ID: A Unique ID is generated for newly added member into the portal.

Member ID: It indicates the Member ID of the member.

AccessID: Access card number of the Member. Maxlength is 100
Type: It indicates the type of member like Visitor or Staff or member etc…
Status: This is the status given by the admin to the member. Status could be Active or Inactive.
Registered Date: This field indicates the date when the member was registered. Picture on File: This field shows whether the member’s photo was uploaded or not.

App Registration: This field shows whether the member is registered with contract tracing app

Beacon Assigned: This field shows whether the member is assigned with Beacon

Group type: This field shows whether the member is assigned to particular group.

Network ID: This field indicates whether the member is assigned to particular Network ID.

Active From Date: This date picker field indicates the duration start for member profile activeness .

Active To Date: This date picker field indicates the duration ends for member profile activeness.

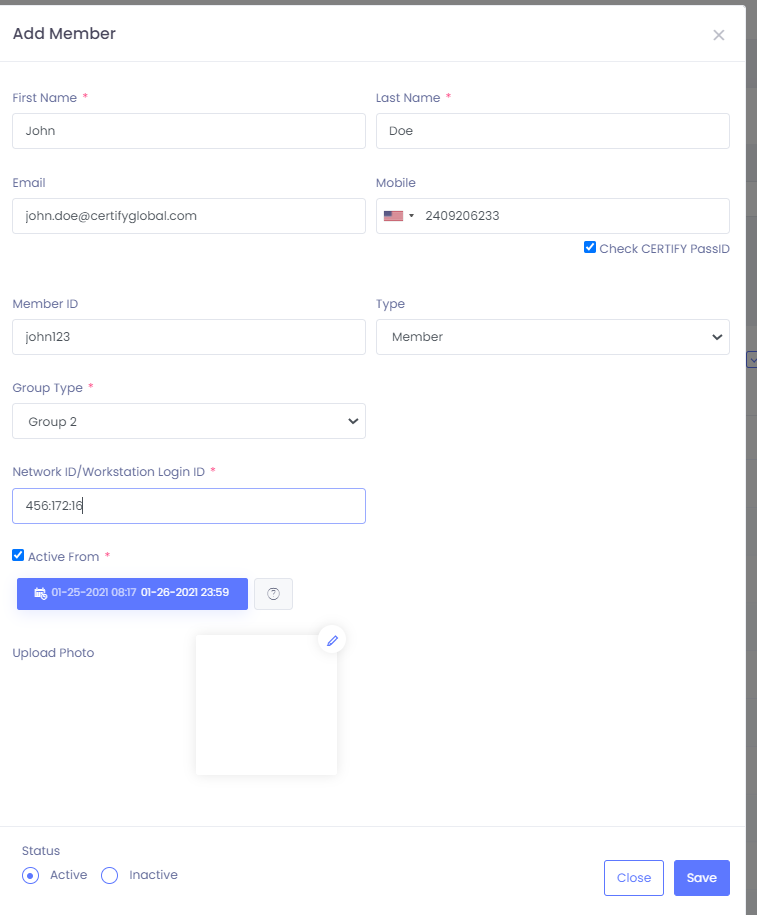
Check CERTIFY PassID: It identifies unique Email/Mobile for the particular member from global universal database.(Checkbox seen under mobile section).

Figure-1

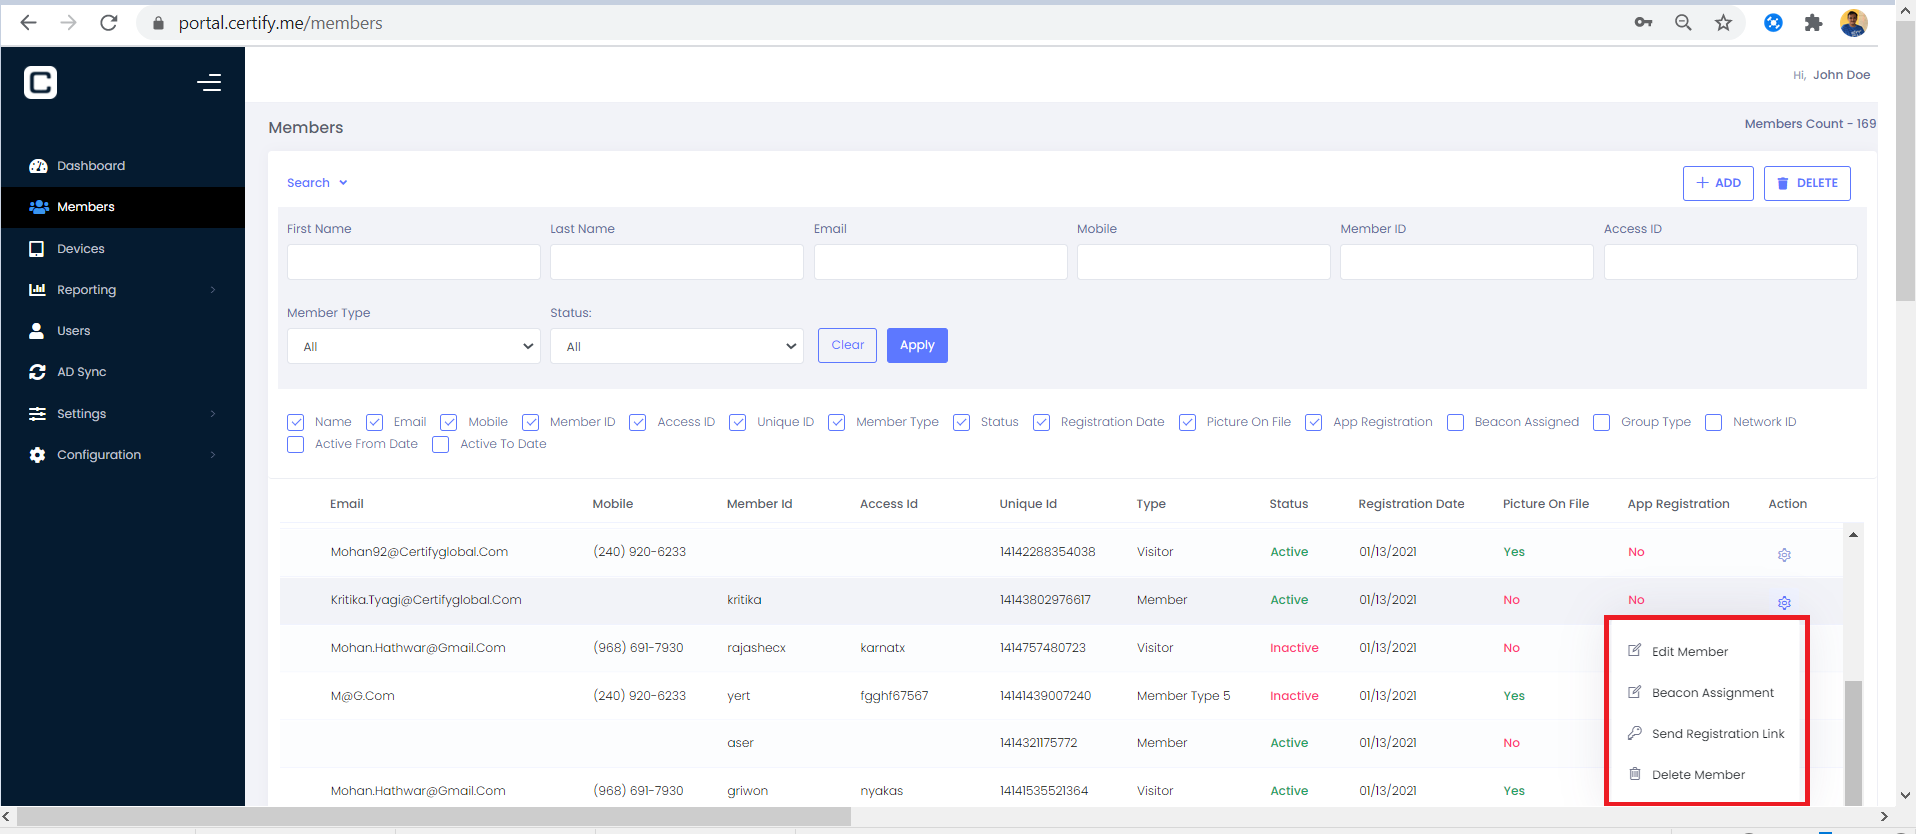
Actions: The gear icon under ‘Action’ gives below options to user.

Edit Member: To edit the existing member’s details.

Send Registration Link: User can send registration link to registered member through this option.

Delete Member: To delete a registered member from the portal.

Refer the specific tabs for detailed info.

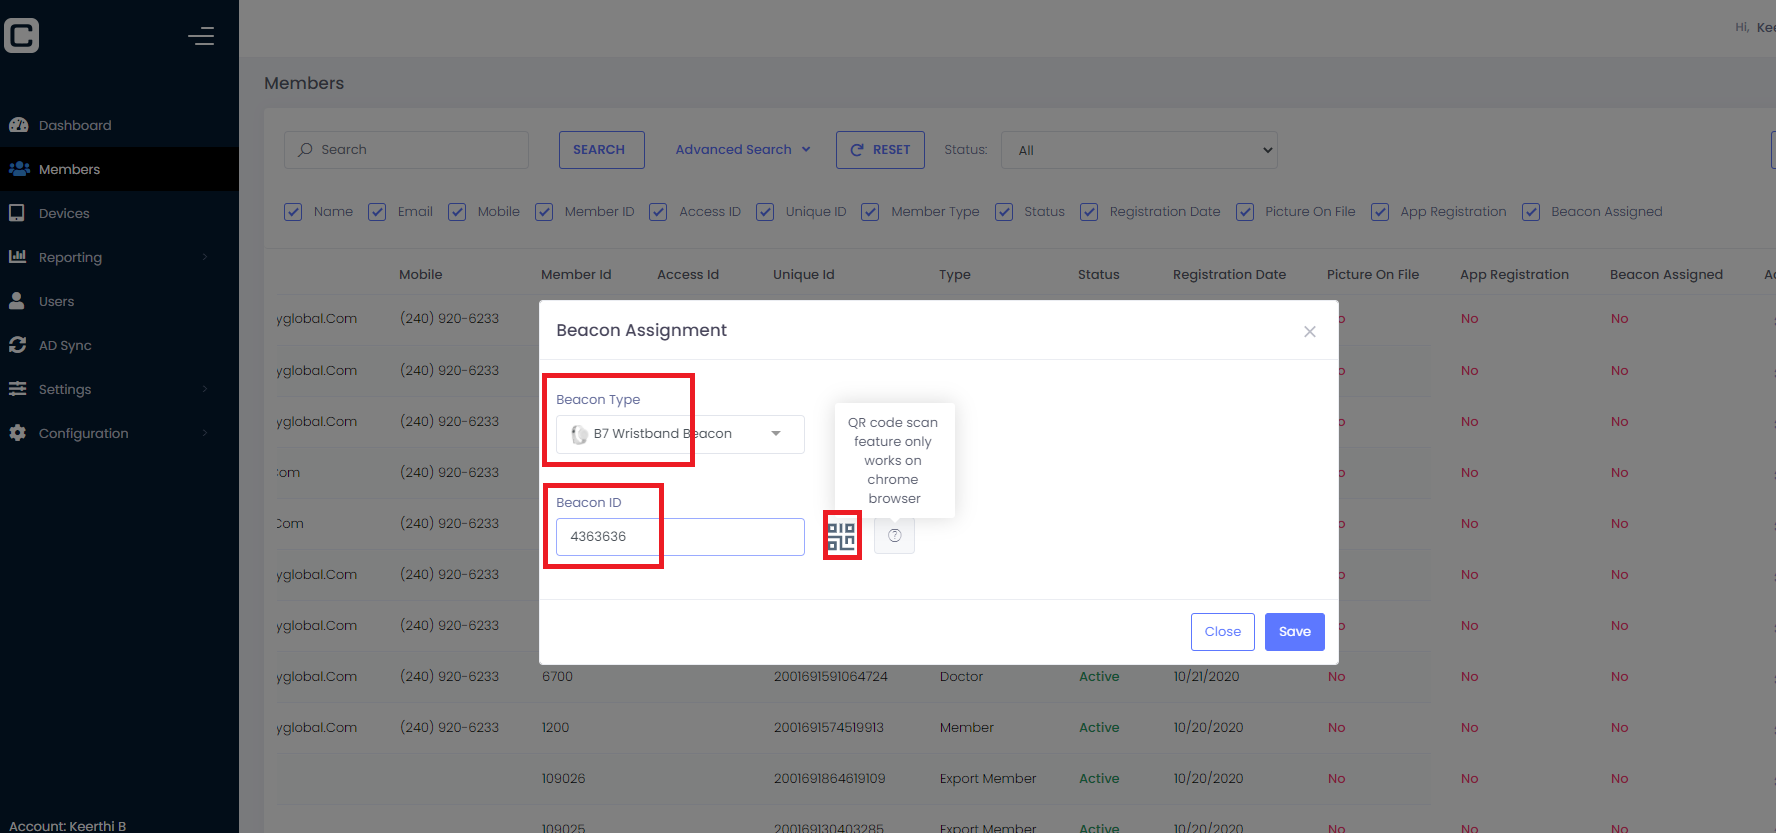
Beacon Assignment: To assign the beacon id for respective member.

Beacon Id can be assigned selecting the beacon type and provide the beacon Id and also using QR scan code feature by scanning QR code as shown in Figure 1.2

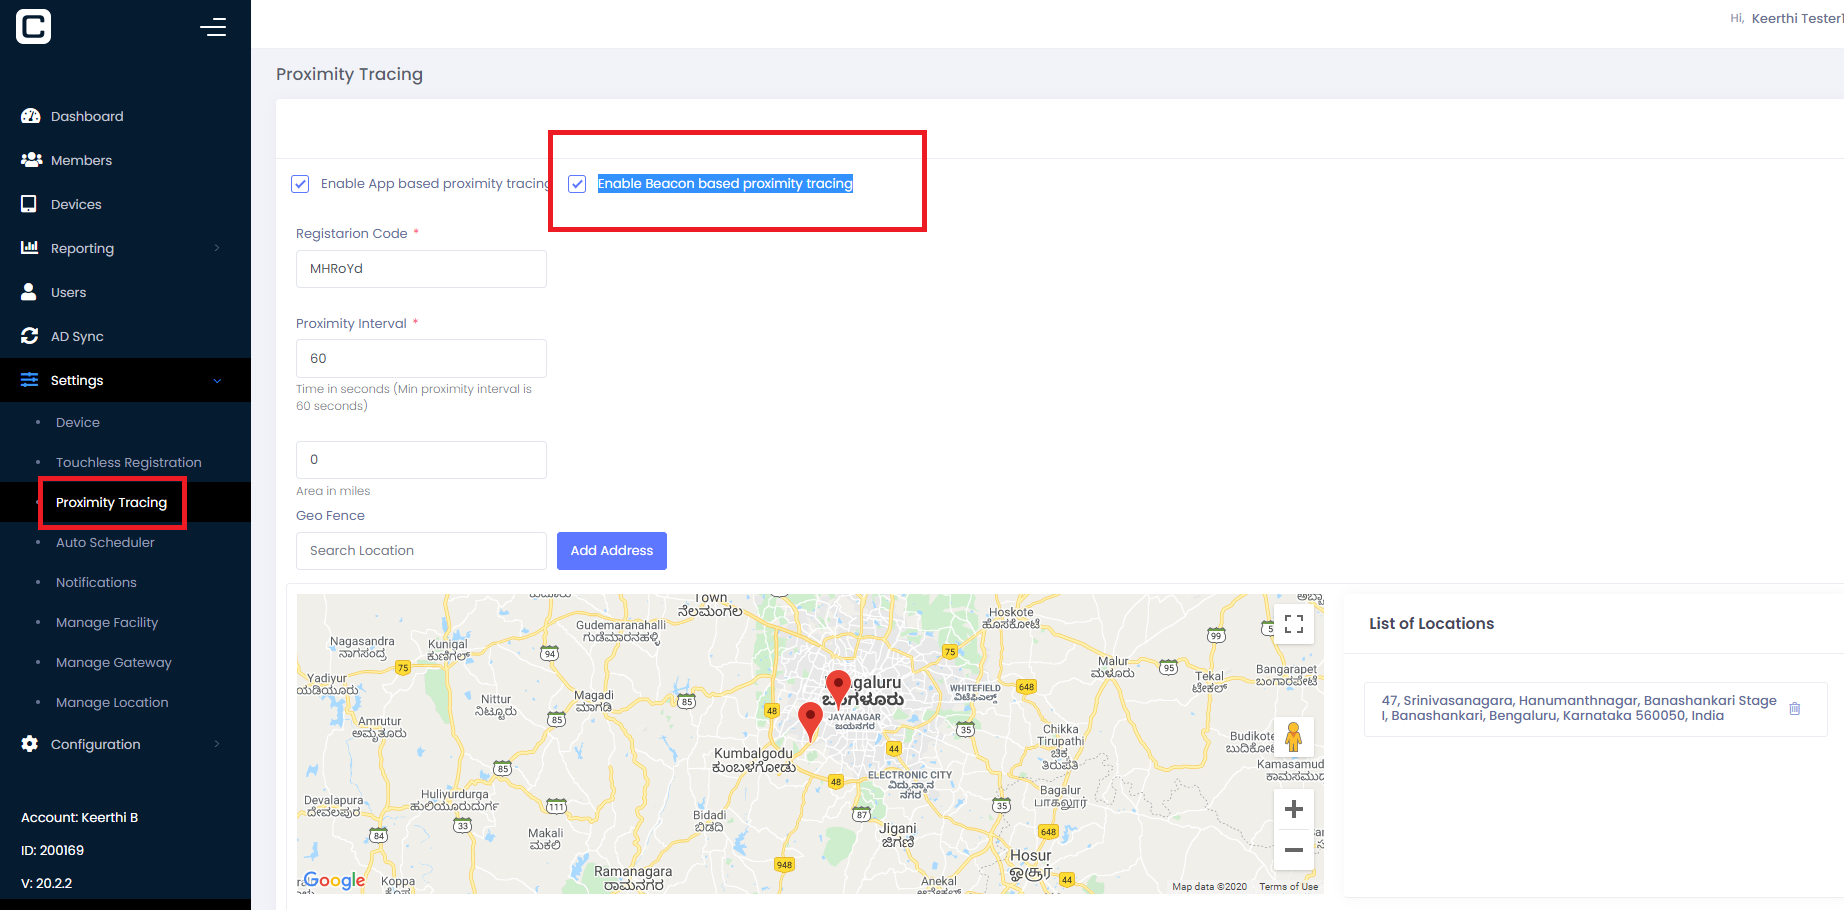
Beacon option will be displayed under actions in member page only when option “Enable Beacon based proximity tracing” is enabled under Proximity Tracing as shown in Figure 2

Figure 1.2

Figure 2


Add: To add the new member details, user can click on the Add button.

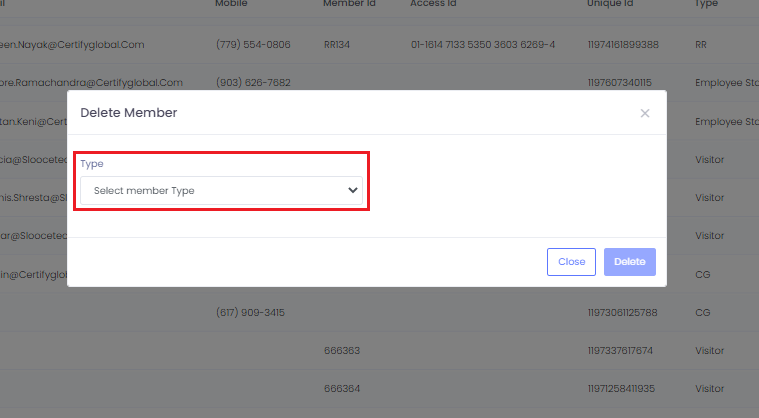
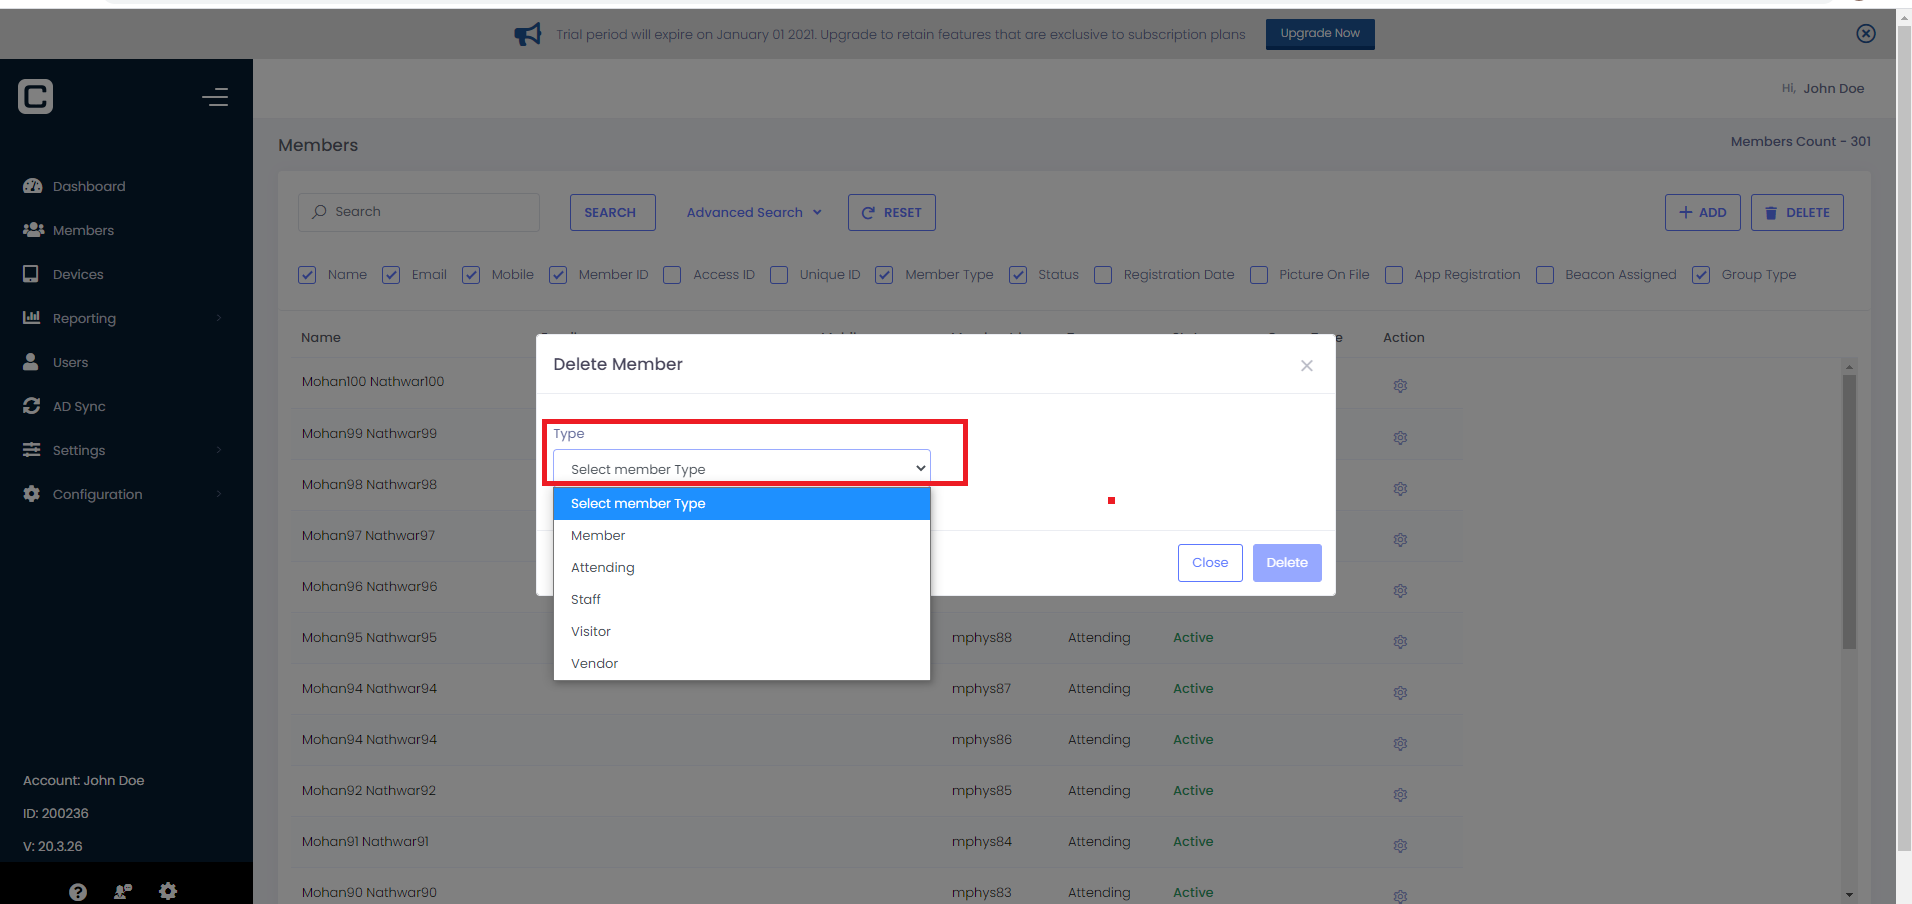
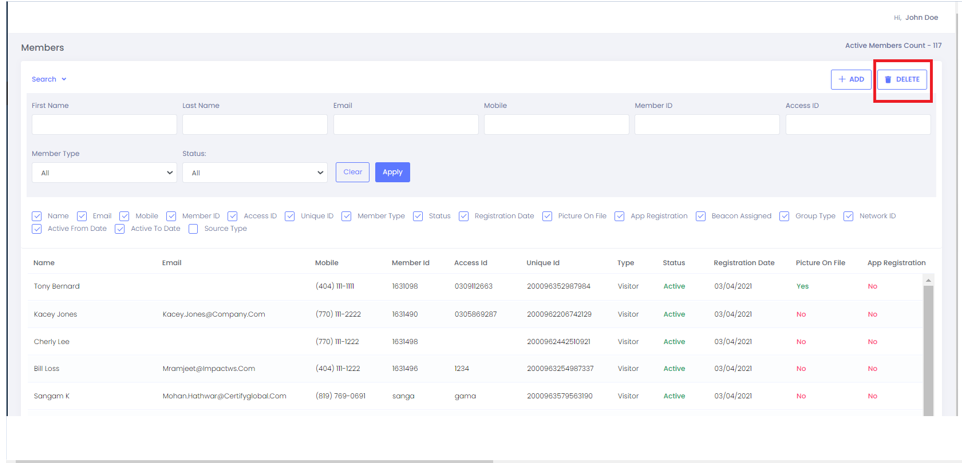
Delete: To bulk delete members, click on Delete button. Delete bulk members by selecting the member type from the drop down as shown in Figure 3.1.

Export: This option is used to export the member list in an excel format.

Import: This option is very useful for the bulk import of members.

Refer the specific tabs on above for detailed info.

Figure-3.1

Figure 3.1

Member Count: It displays the number of members added to the screen as shown in figure 1

  • Though the pagination of members is limited to 20, if there are more than 20 members added in member screen it can be displayed in member count and Member Export which will be downloaded in form of excel sheet

Figure 1:


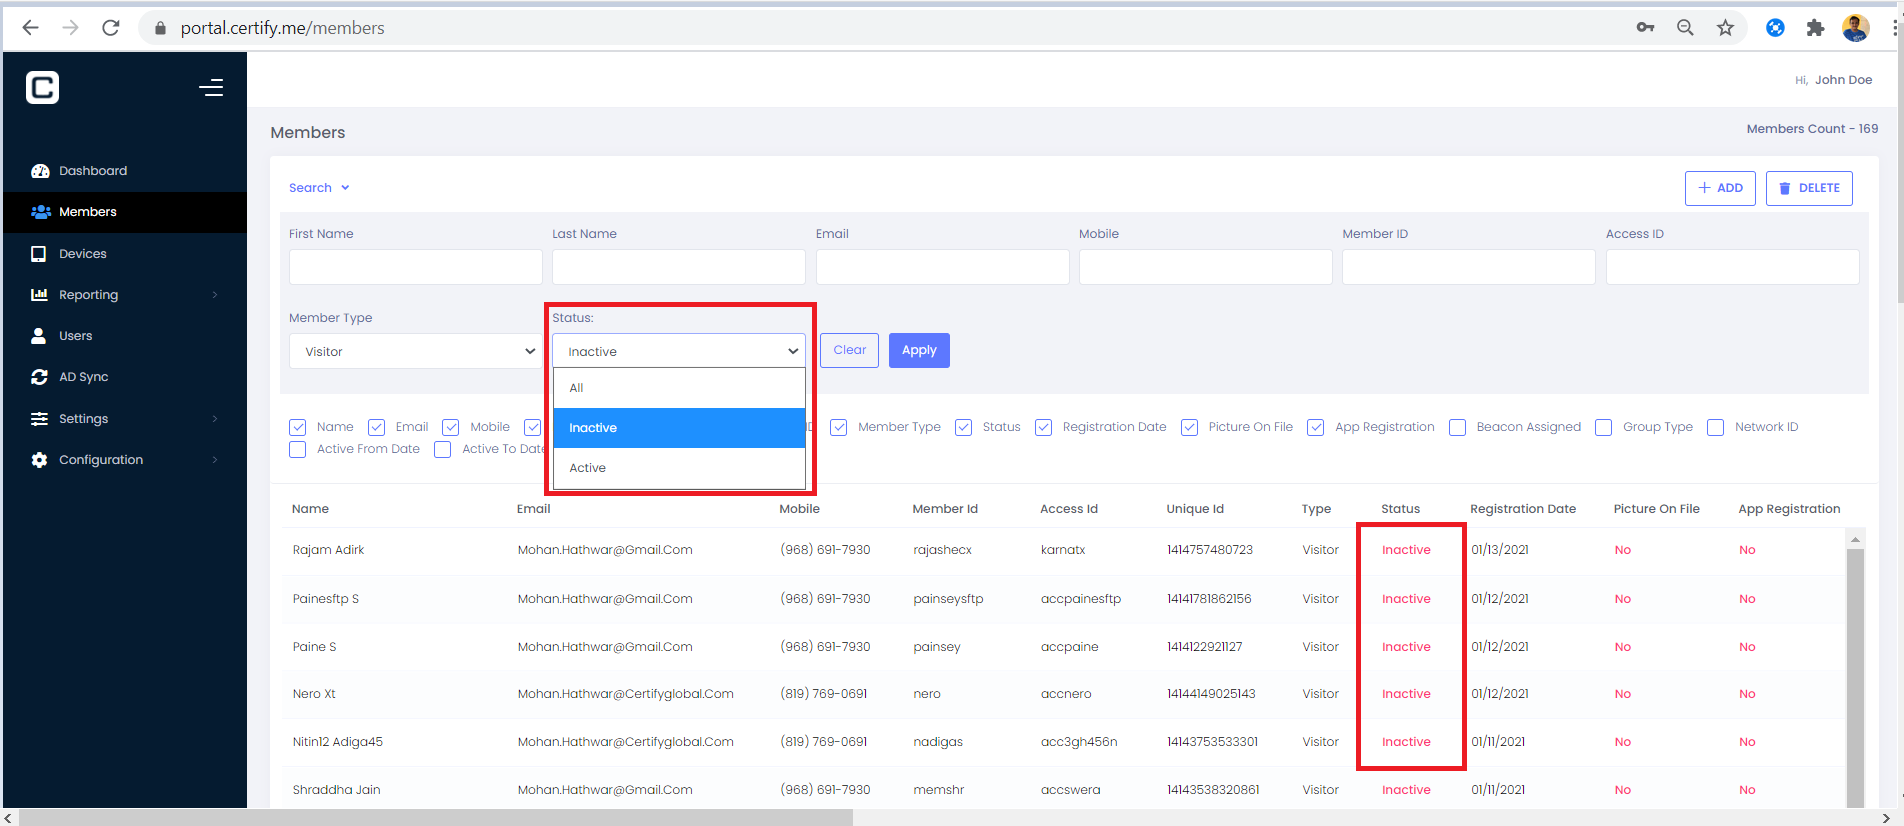
Status Drop-down in Search box:

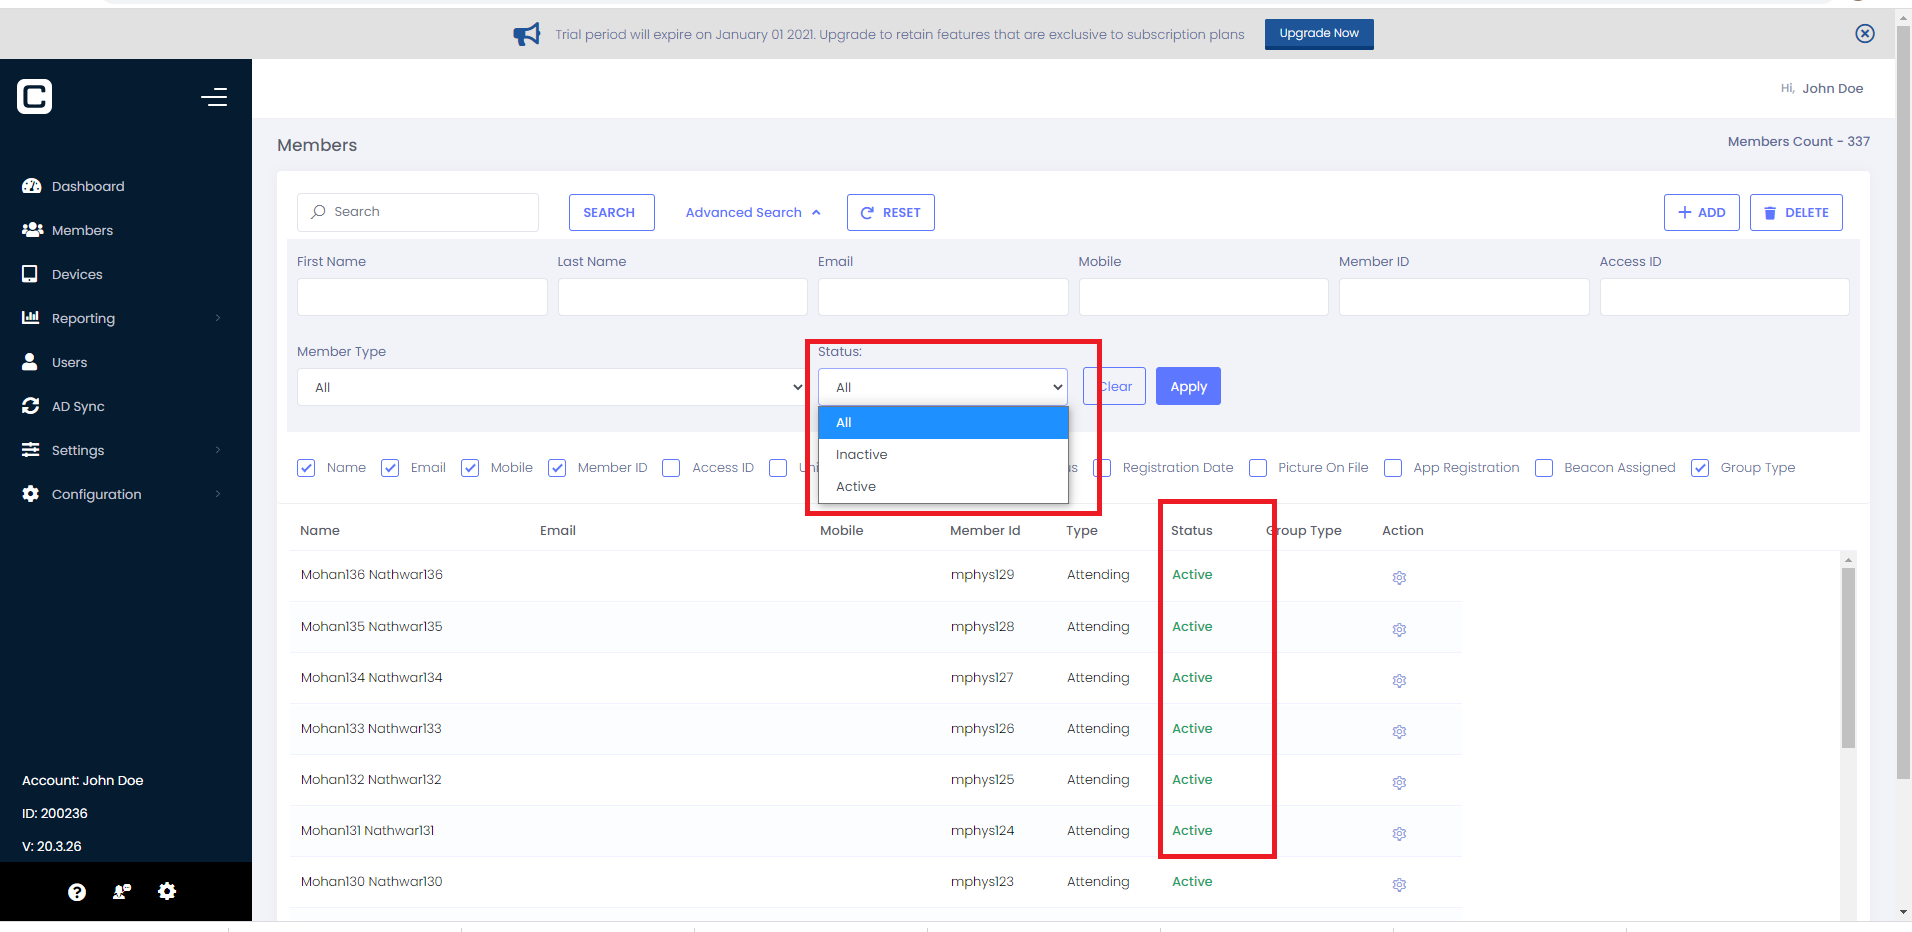
User can use this ‘Status drop down’ to display member details based on the status selected from the drop down as shown in Figure-5

Figure-5


Pagination:

Refer to the ‘Pagination’ Tab

Figure-7

  • Maximum limit of records to display in member page is 20 as shown in Figure 1, but in export to excel it should be max 60K records as Shown in Figure 2
  • If the record Limit is exceeding 60K in Member page during member export throw the error Pop up as shown in Figure 3

Figure 1

Figure 2

Figure 3

Member Count – Display the number of active records available in Member section.

Bulk Delete in Member Page:

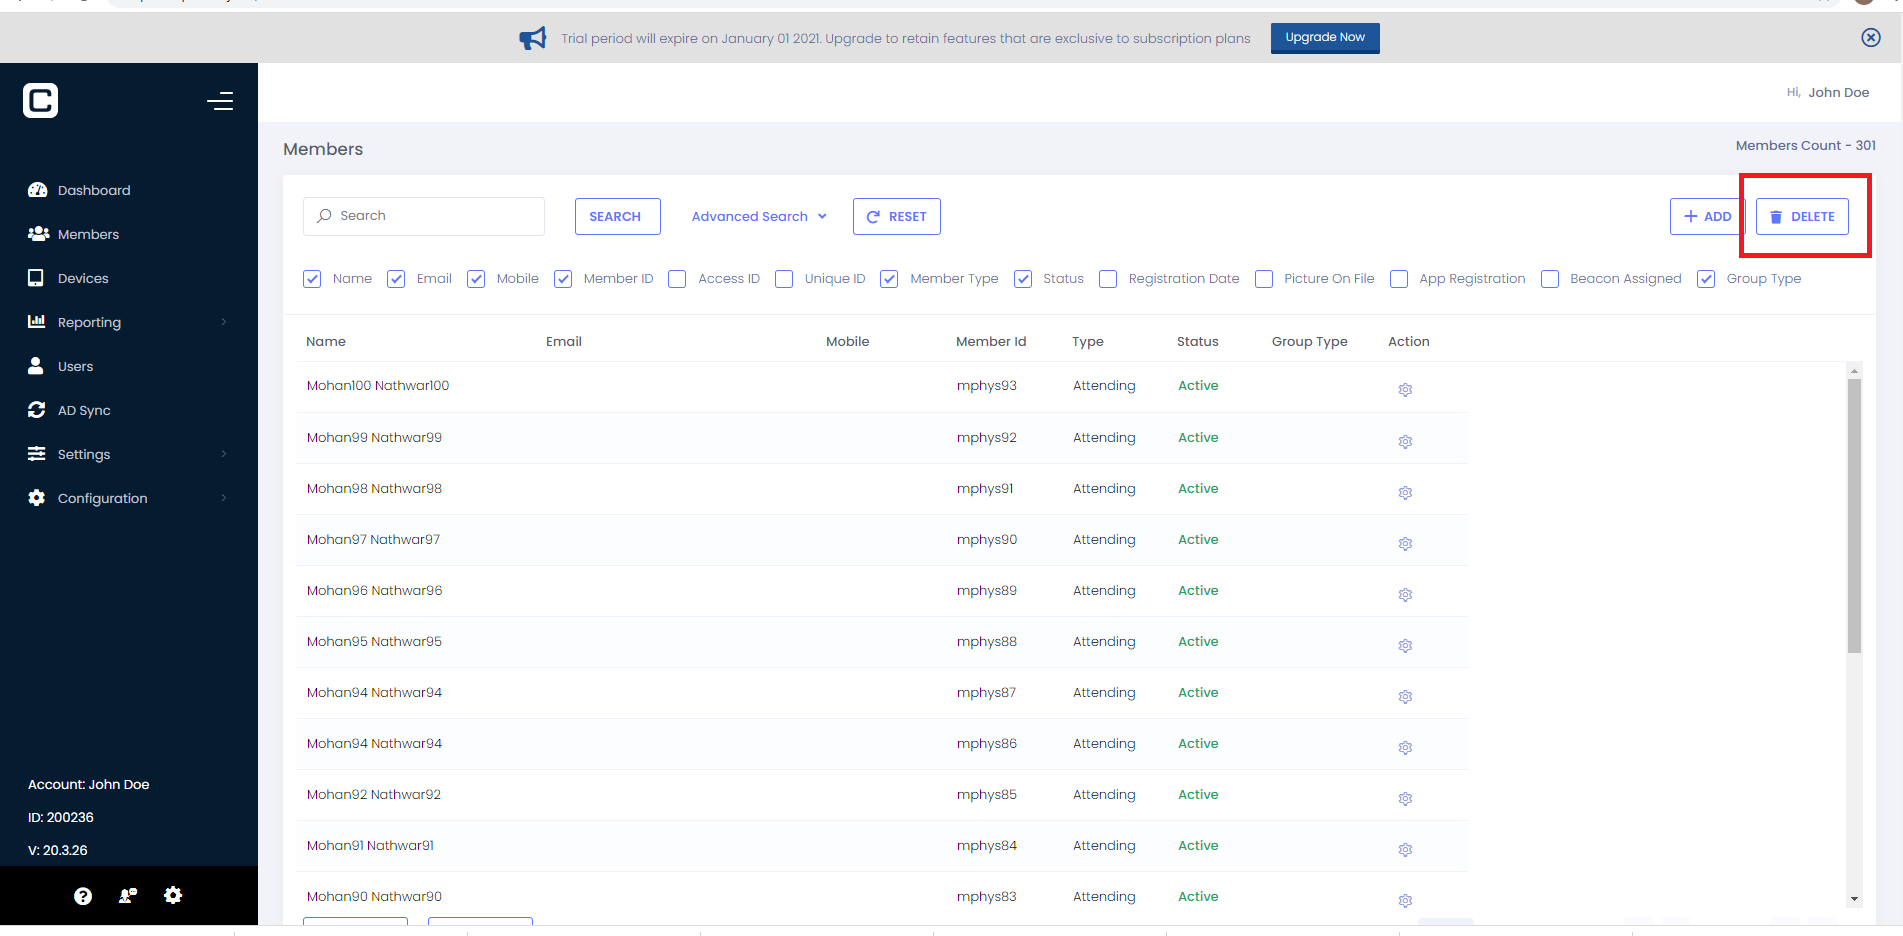
  1. Many or Single Members can be deleted using Bulk Delete option in member page as shown in Figure 1
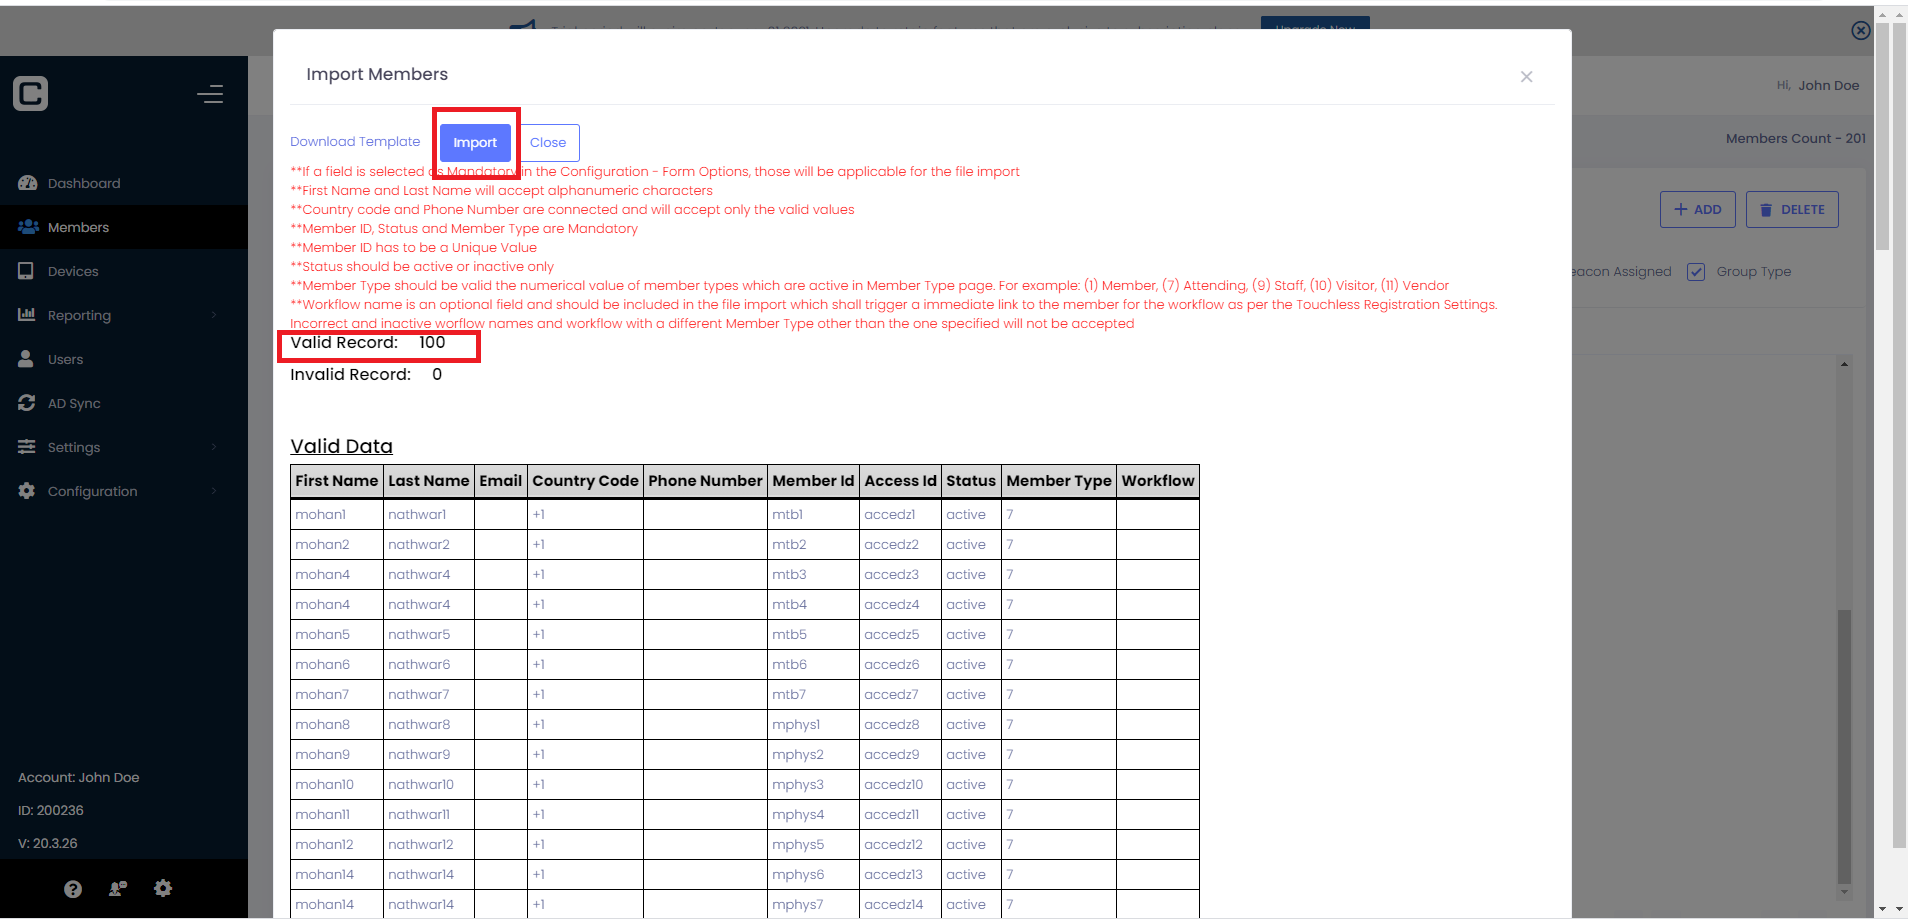
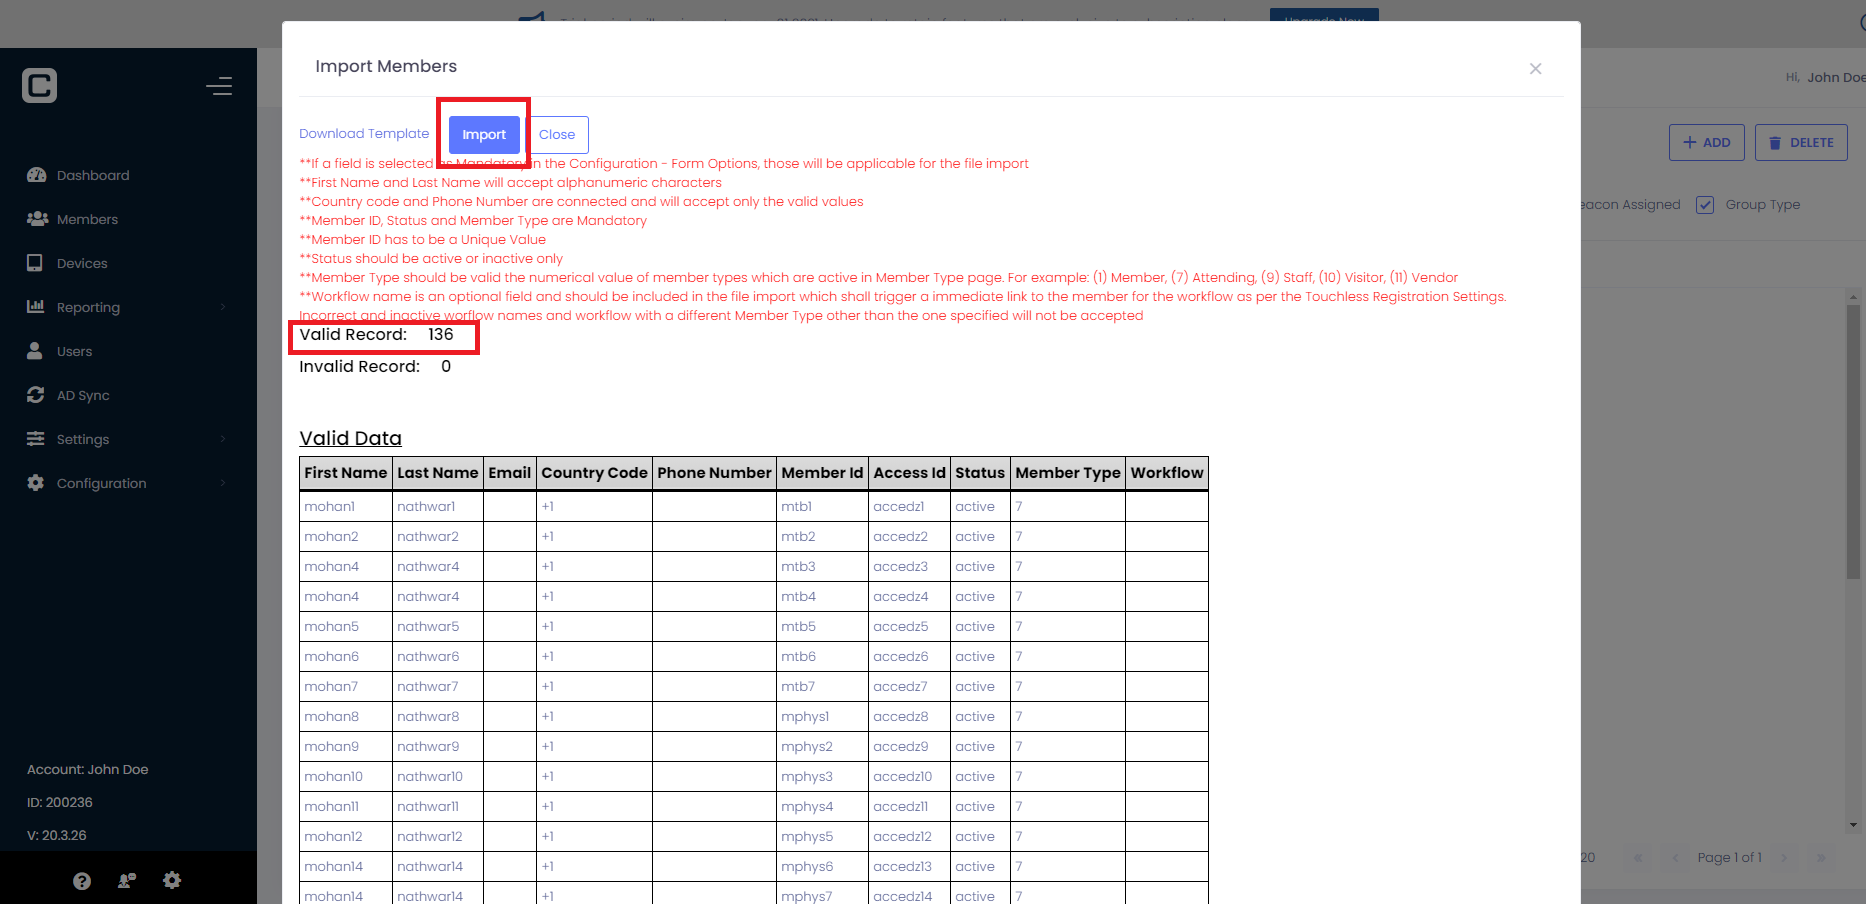
  2. Bulk Delete is restricted to up to 100 members at a time. To delete bulk members, it should be imported first as shown in figure 2
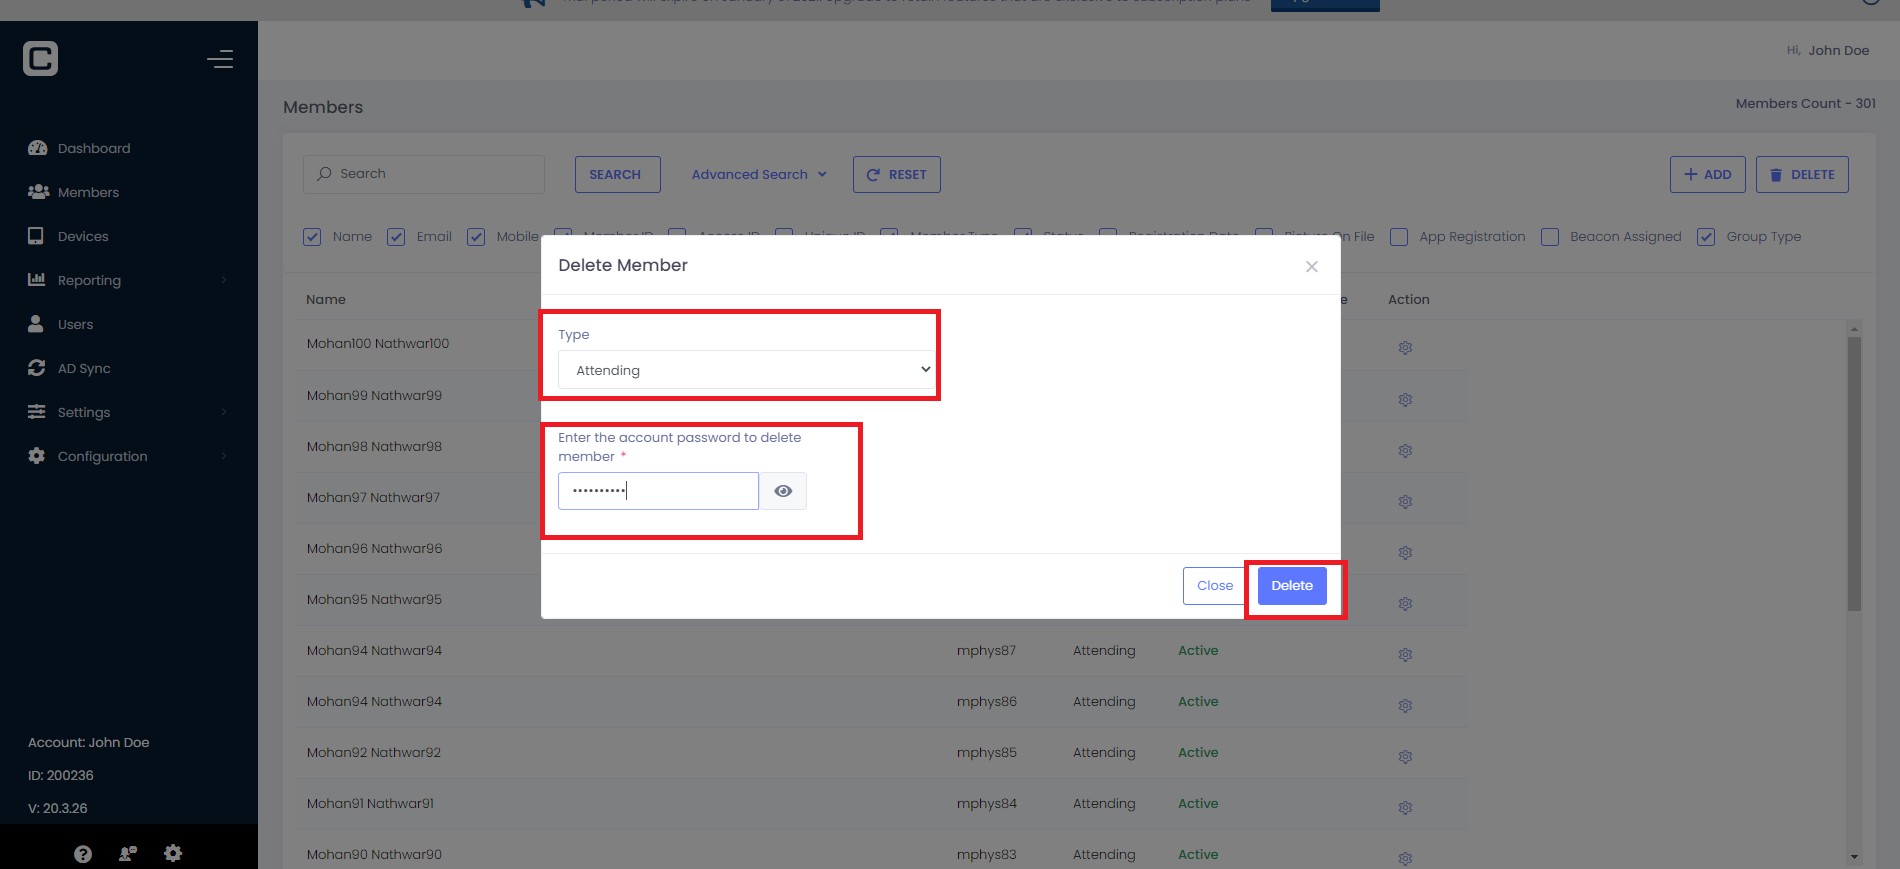
  3. After Clicking on Bulk delete button delete Member pop up will display to select for respective member type as shown in Figure 3
  4. Respective member Type should be selected and should provide the valid password to delete the members as shown in Figure 4
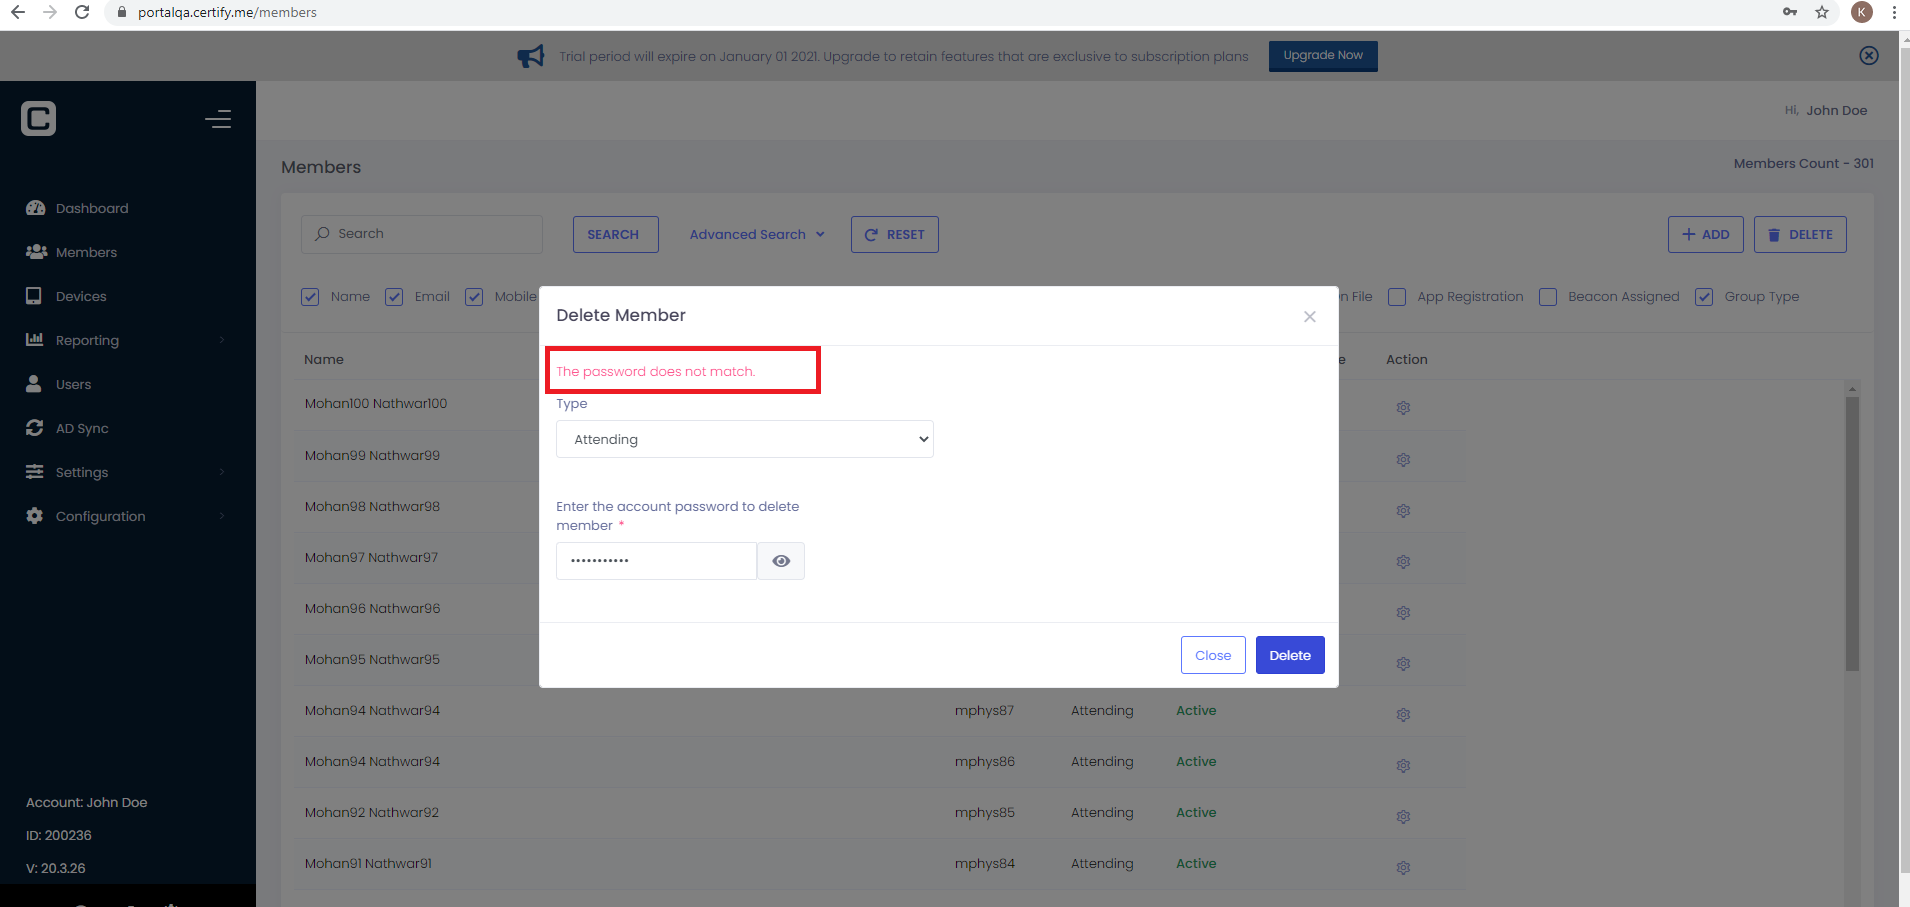
  5. If invalid password is given it will throw the validation error as “The password does not match” as shown in Figure 4
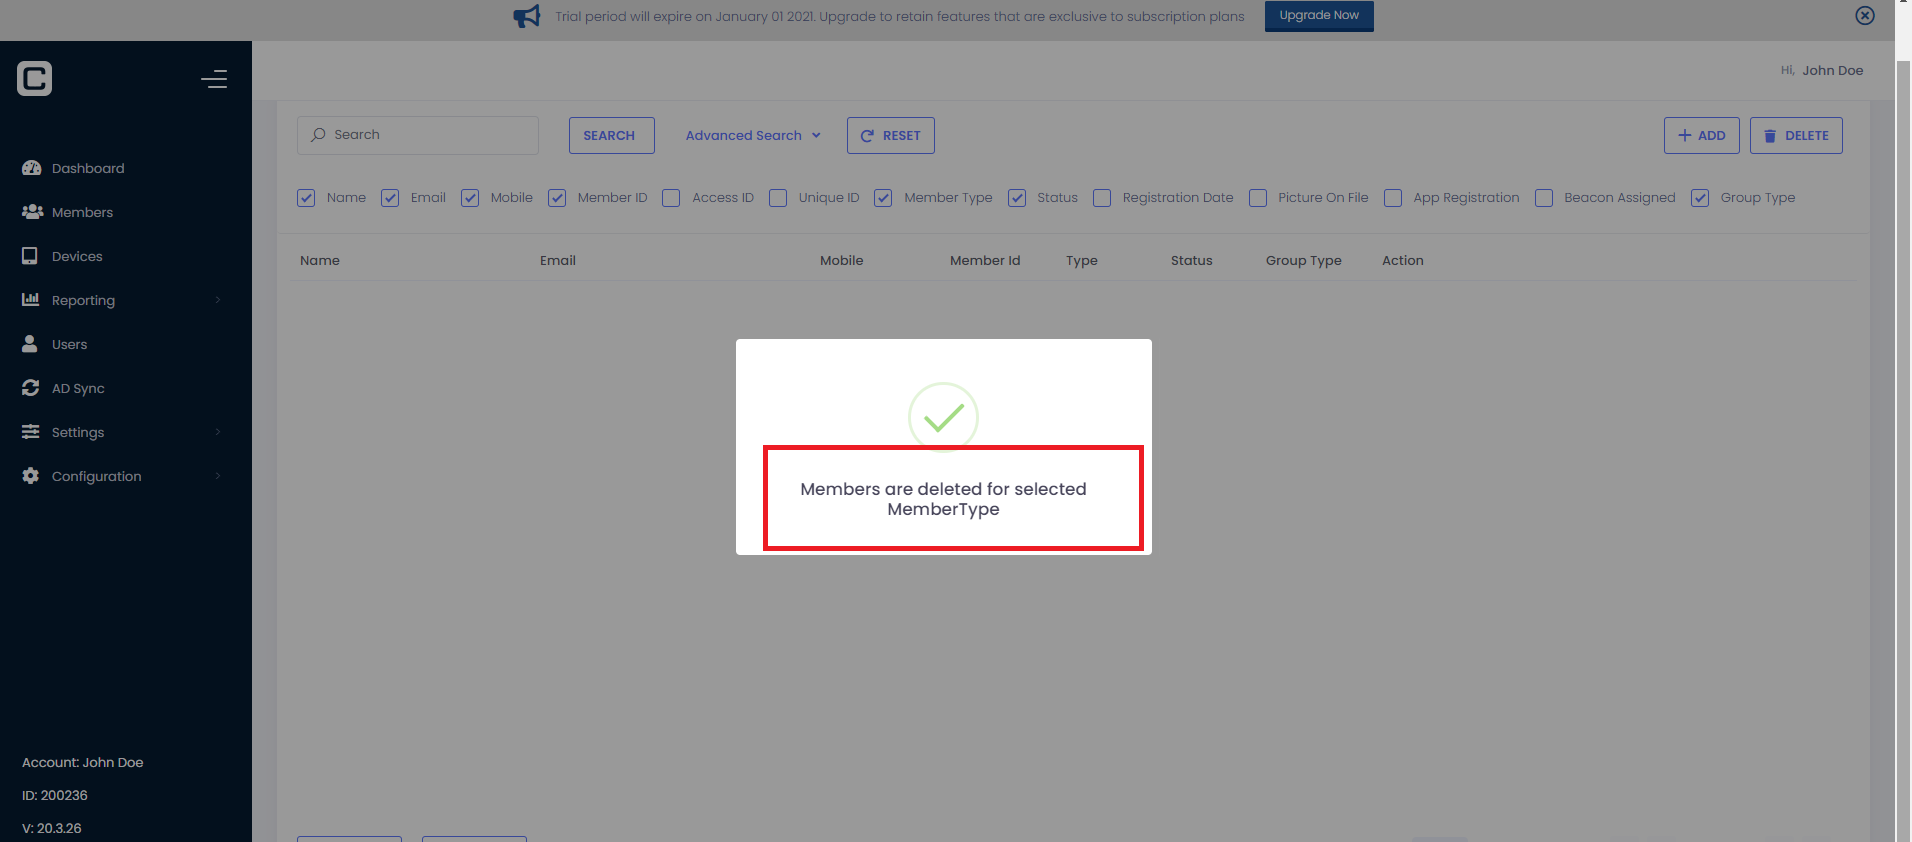
  6. Once Bulk members are deleted it will display the pop up as shown in Figure 5.
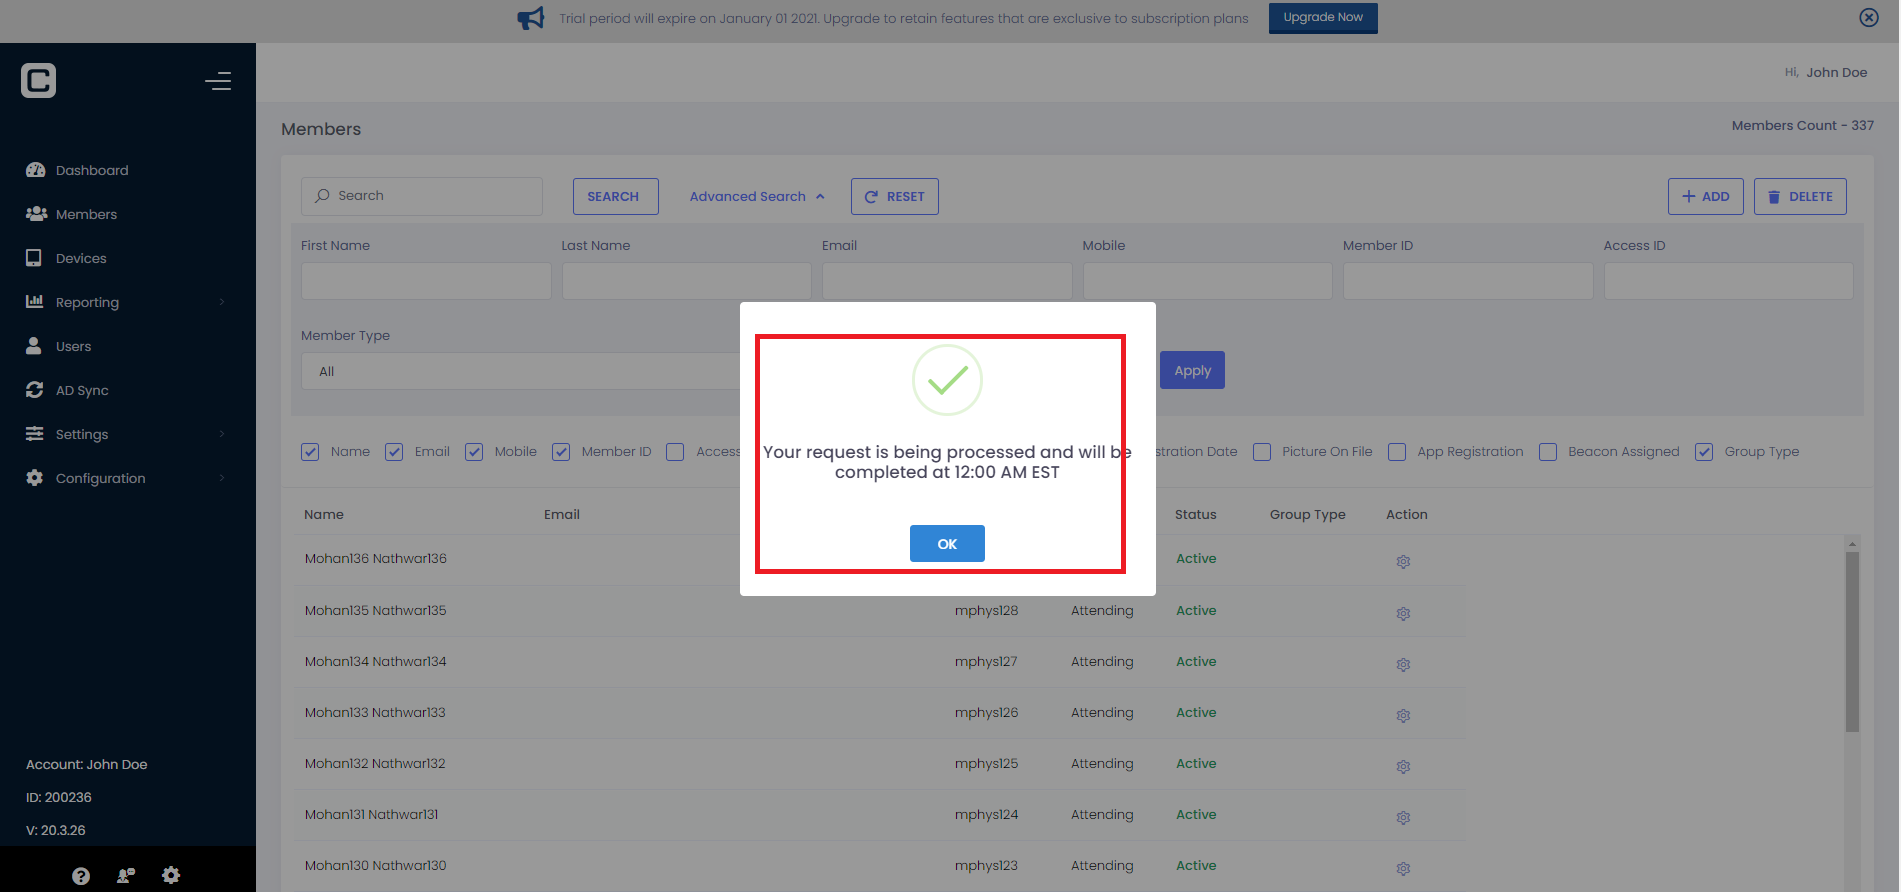
  7. Bulk delete for more than 100 members will be deleted at 12.am as per EST time zone though we mark for deletion at any time. It will display the pop up after marking more than 100 members for deletion as shown in Figure 6
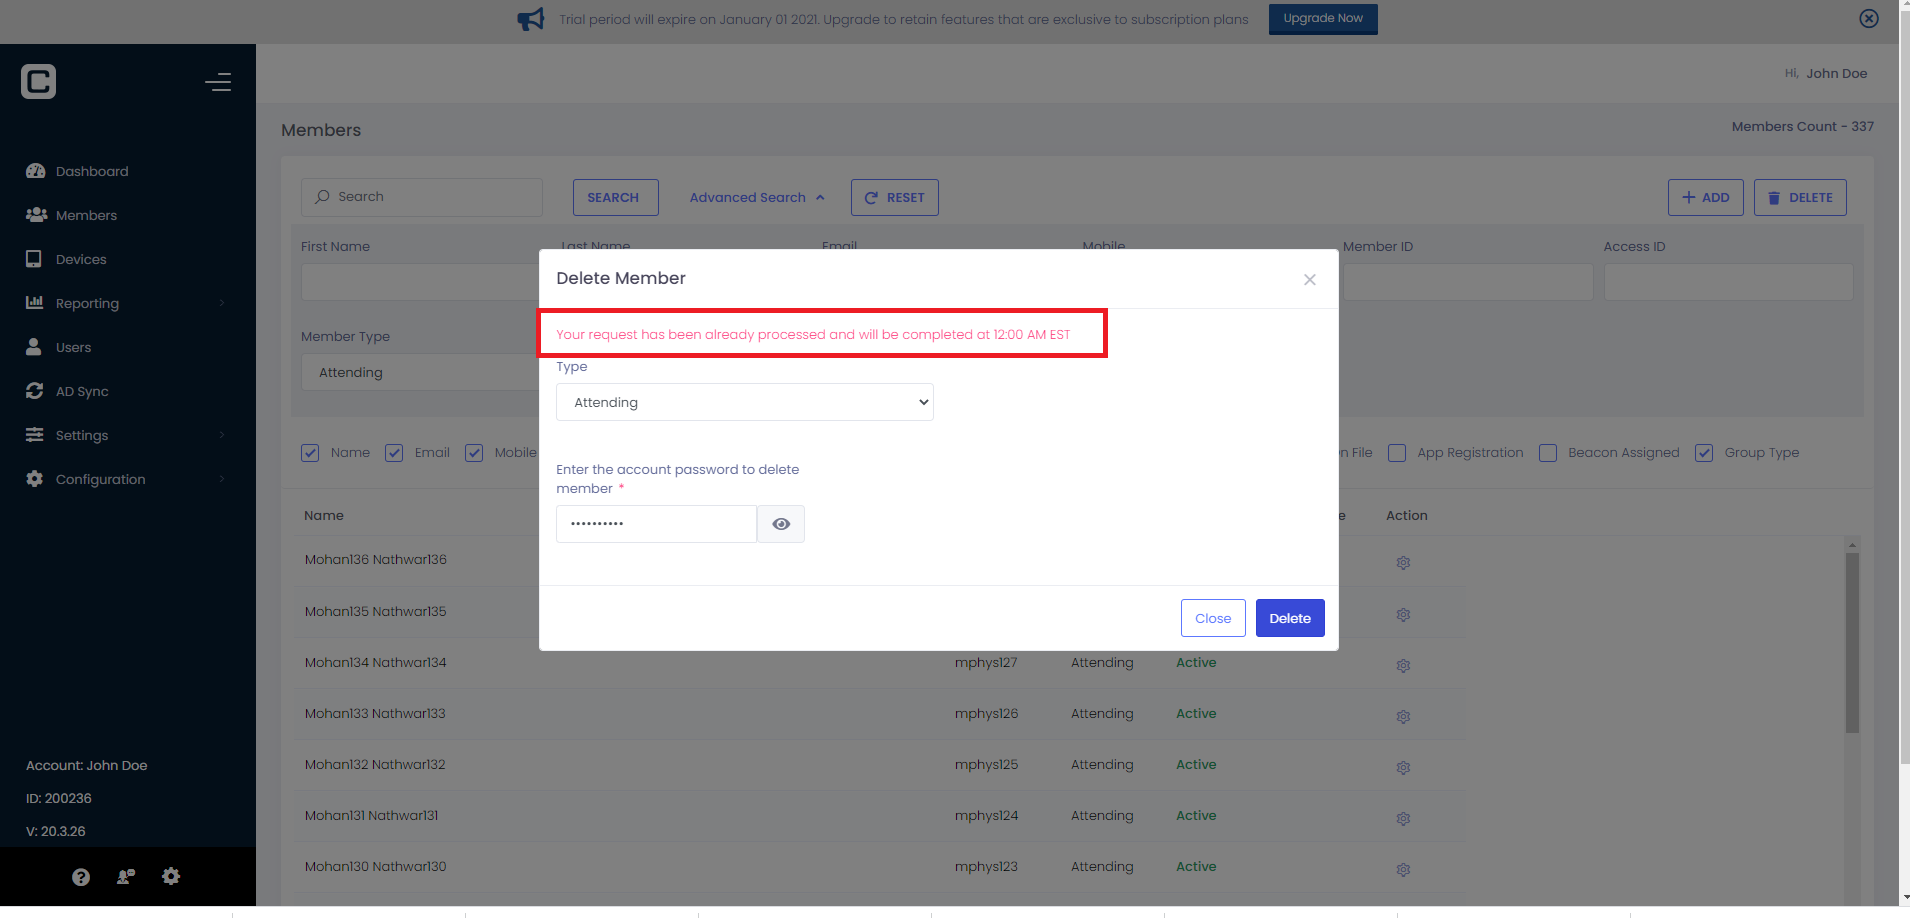
  8. In case if we try to delete the same members again which is already marked for deletion it will throw the validation as shown in Figure 7
  9. Both Active and Inactive members can be deleted using Bulk delete option by selecting the respective status from advance search as shown in Figure 8

Figure 1

Figure 2

Figure 3

Figure 4

Figure 5

Figure 6

Figure 7

Figure 8

Bulk Delete option in Roles and Permissions.

Configuration–>User Role –>Edit the role → Members

checked → Delete button will be visible in Members page
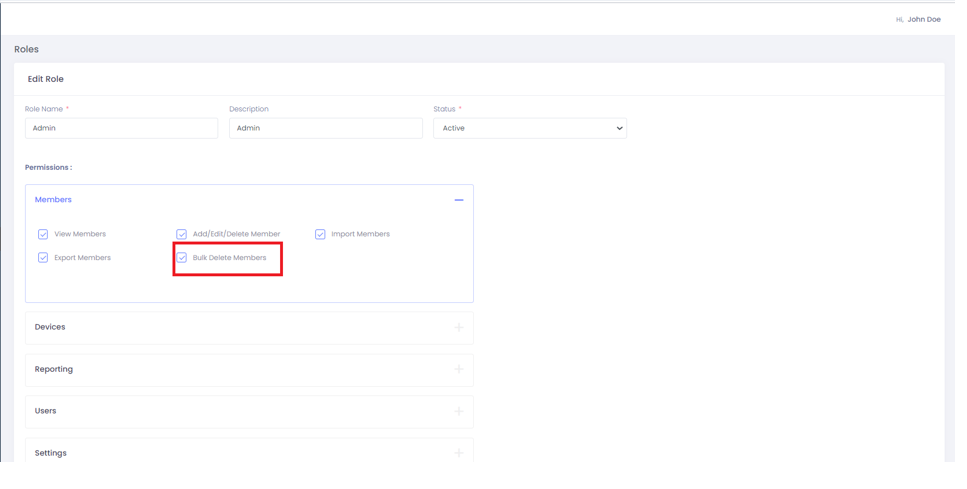
unchecked → Delete button will be hidden in Members page