This is a newly introduced model by which a customer agrees to pay the company for services throughout a specified time-period.
There are currently 4 types of different subscription plans:
-
Basic Access
-
Preferred
-
Premier
-
Enterprise
To know more about these plans, click here.
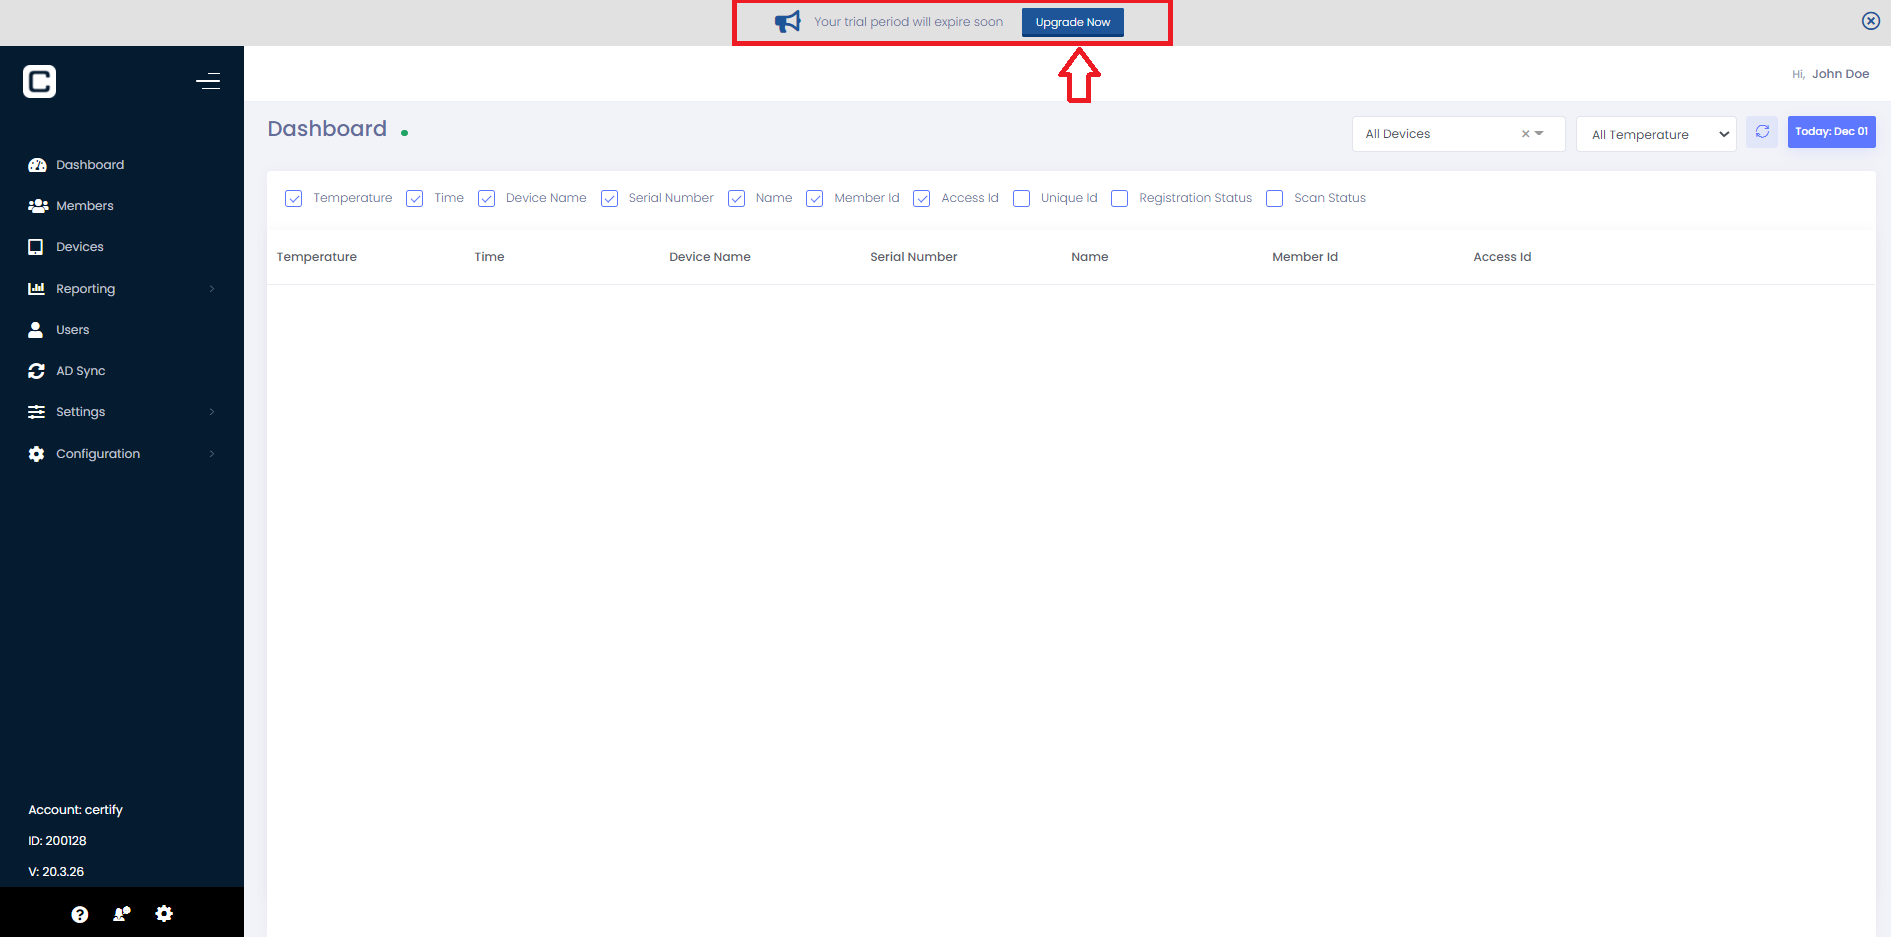
When a user account is close to expiry, user will see the banner on top as shown in image. To ‘Upgrade’, user needs to click the upgrade button.
Only the account owner can register their card on file to complete the subscription.
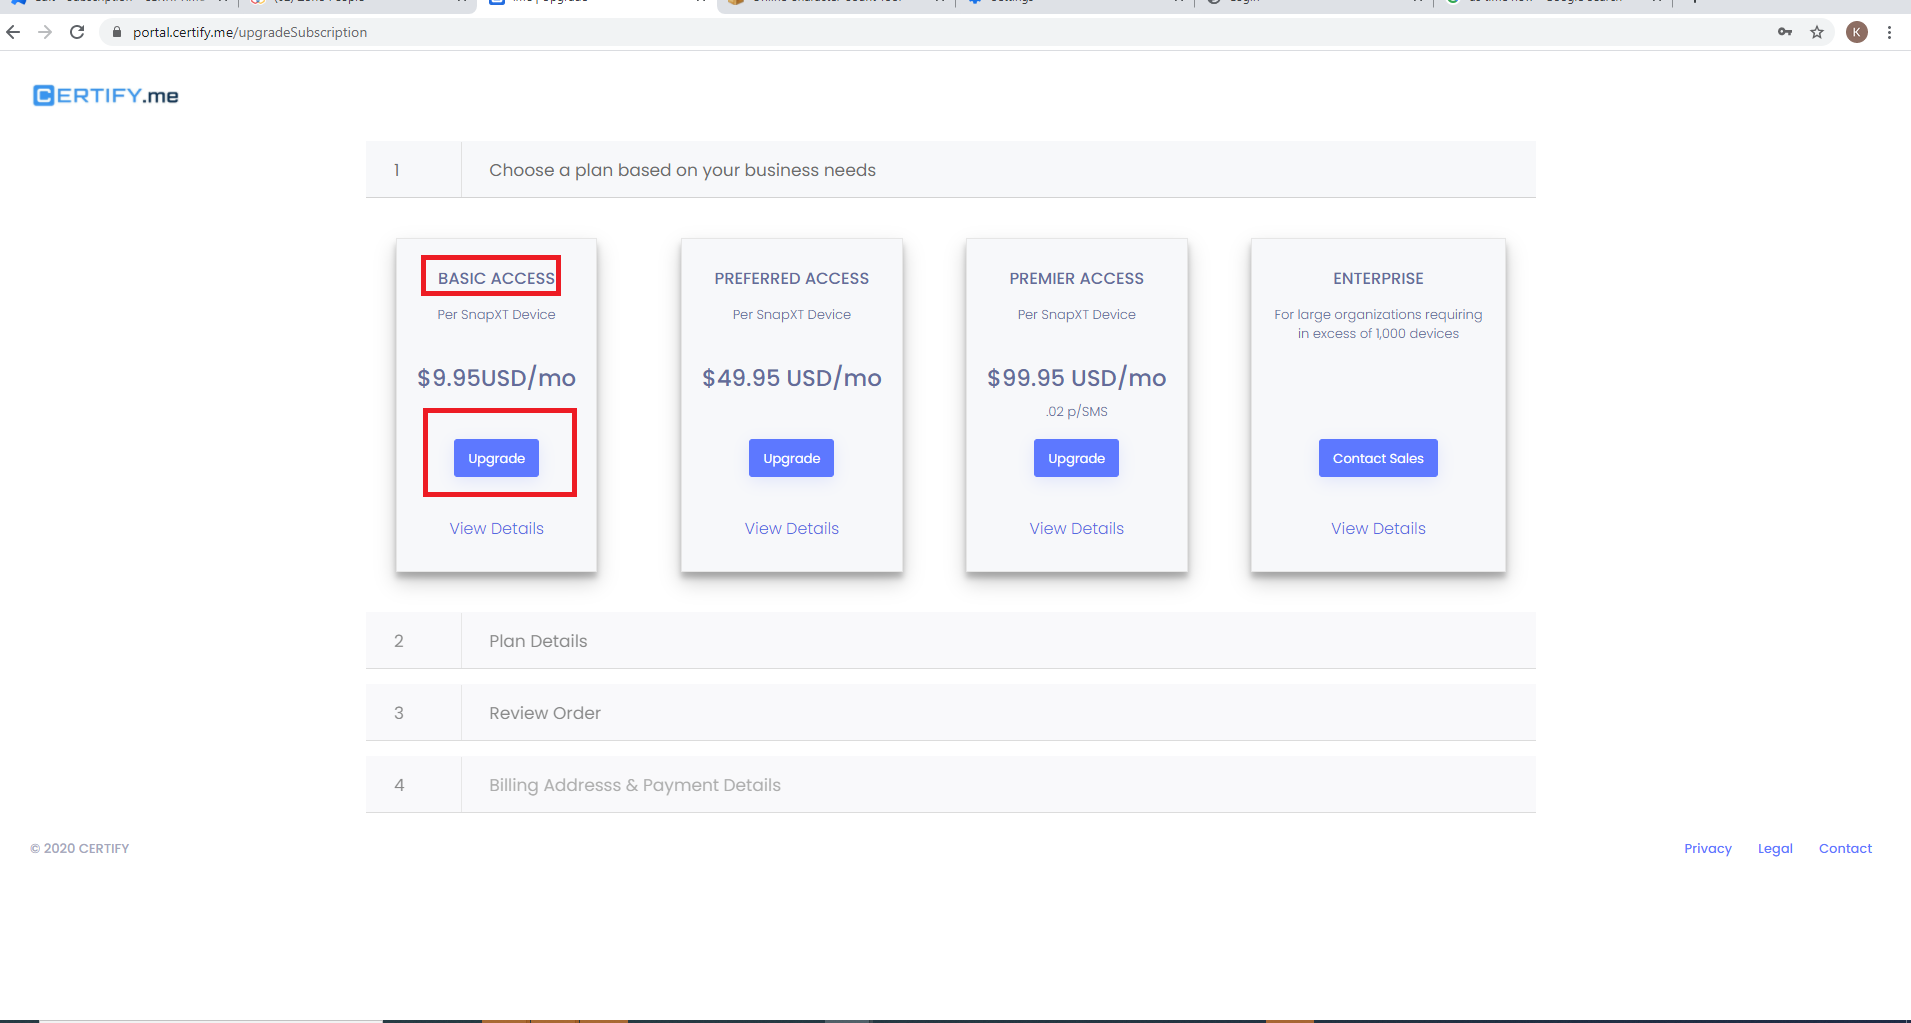
Different subscription plan types will get displayed as shown in Figure 2 to enroll for respective Plan.
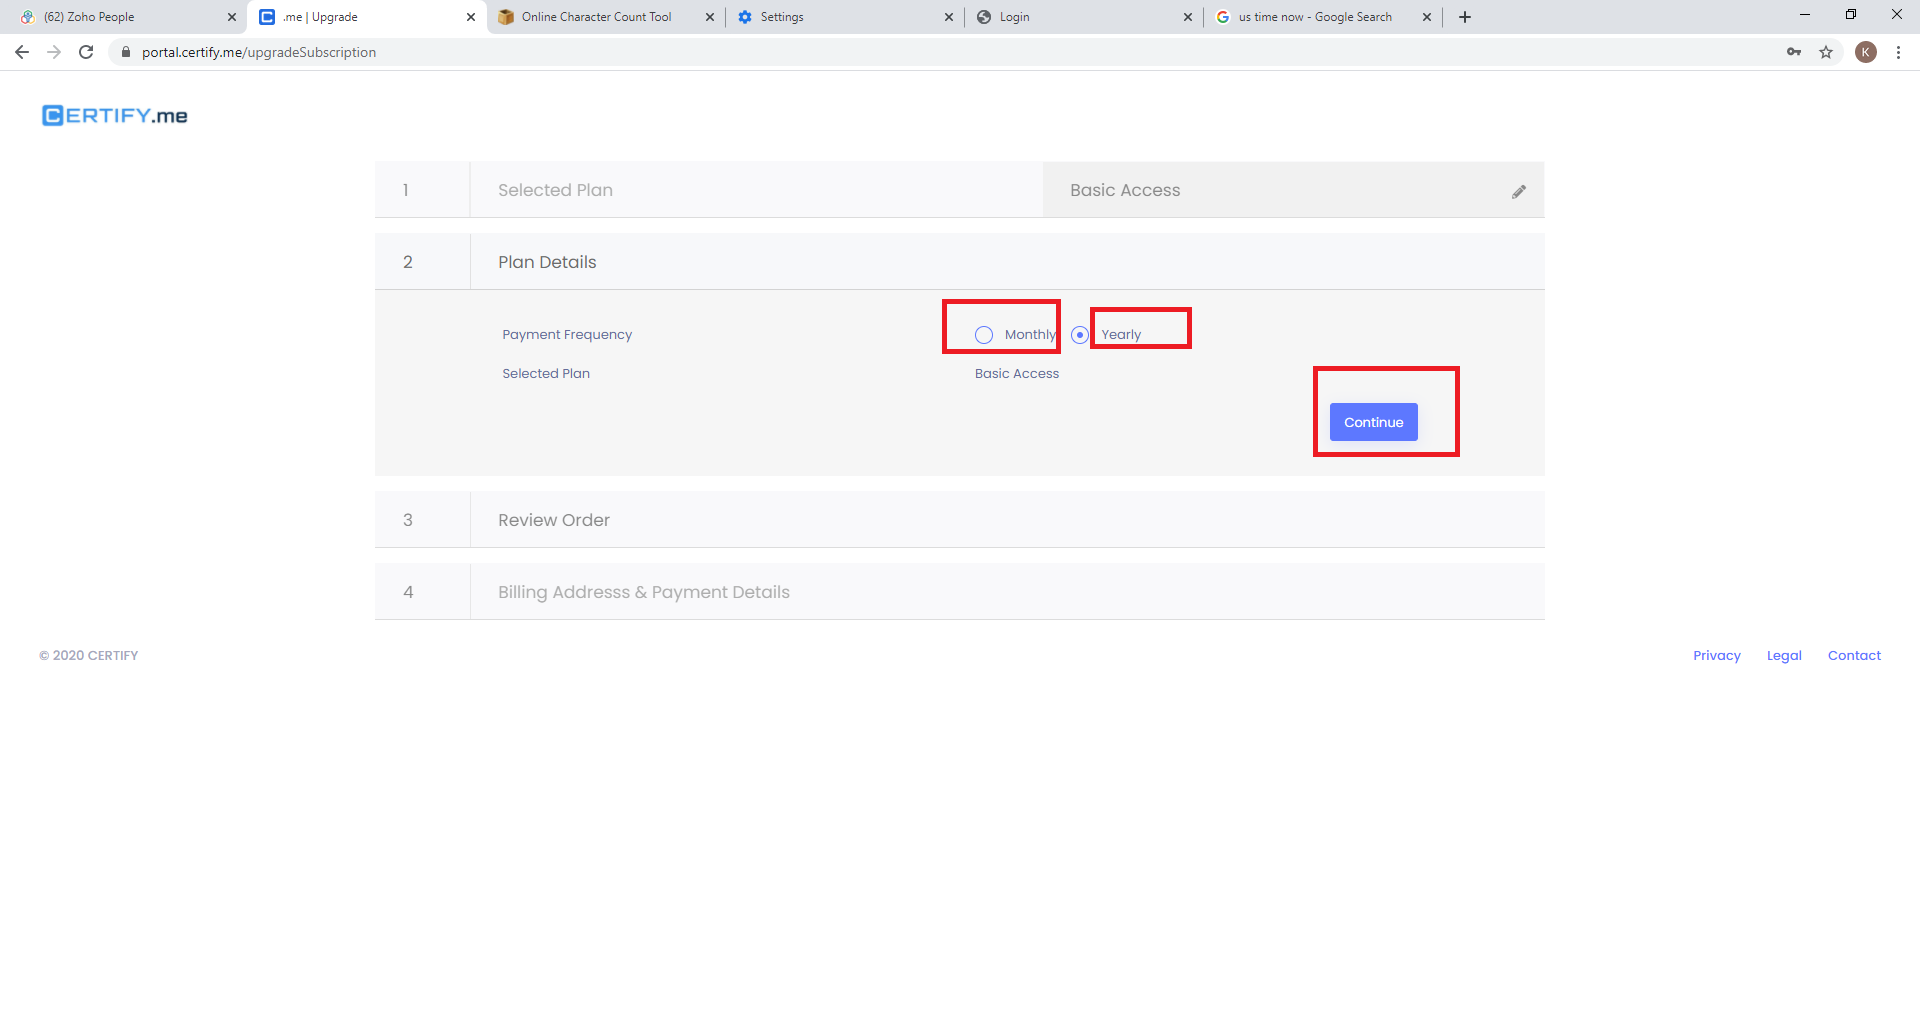
Once user selects the plan the next step is to choose the plan frequency under plan details which could be either monthly or yearly.
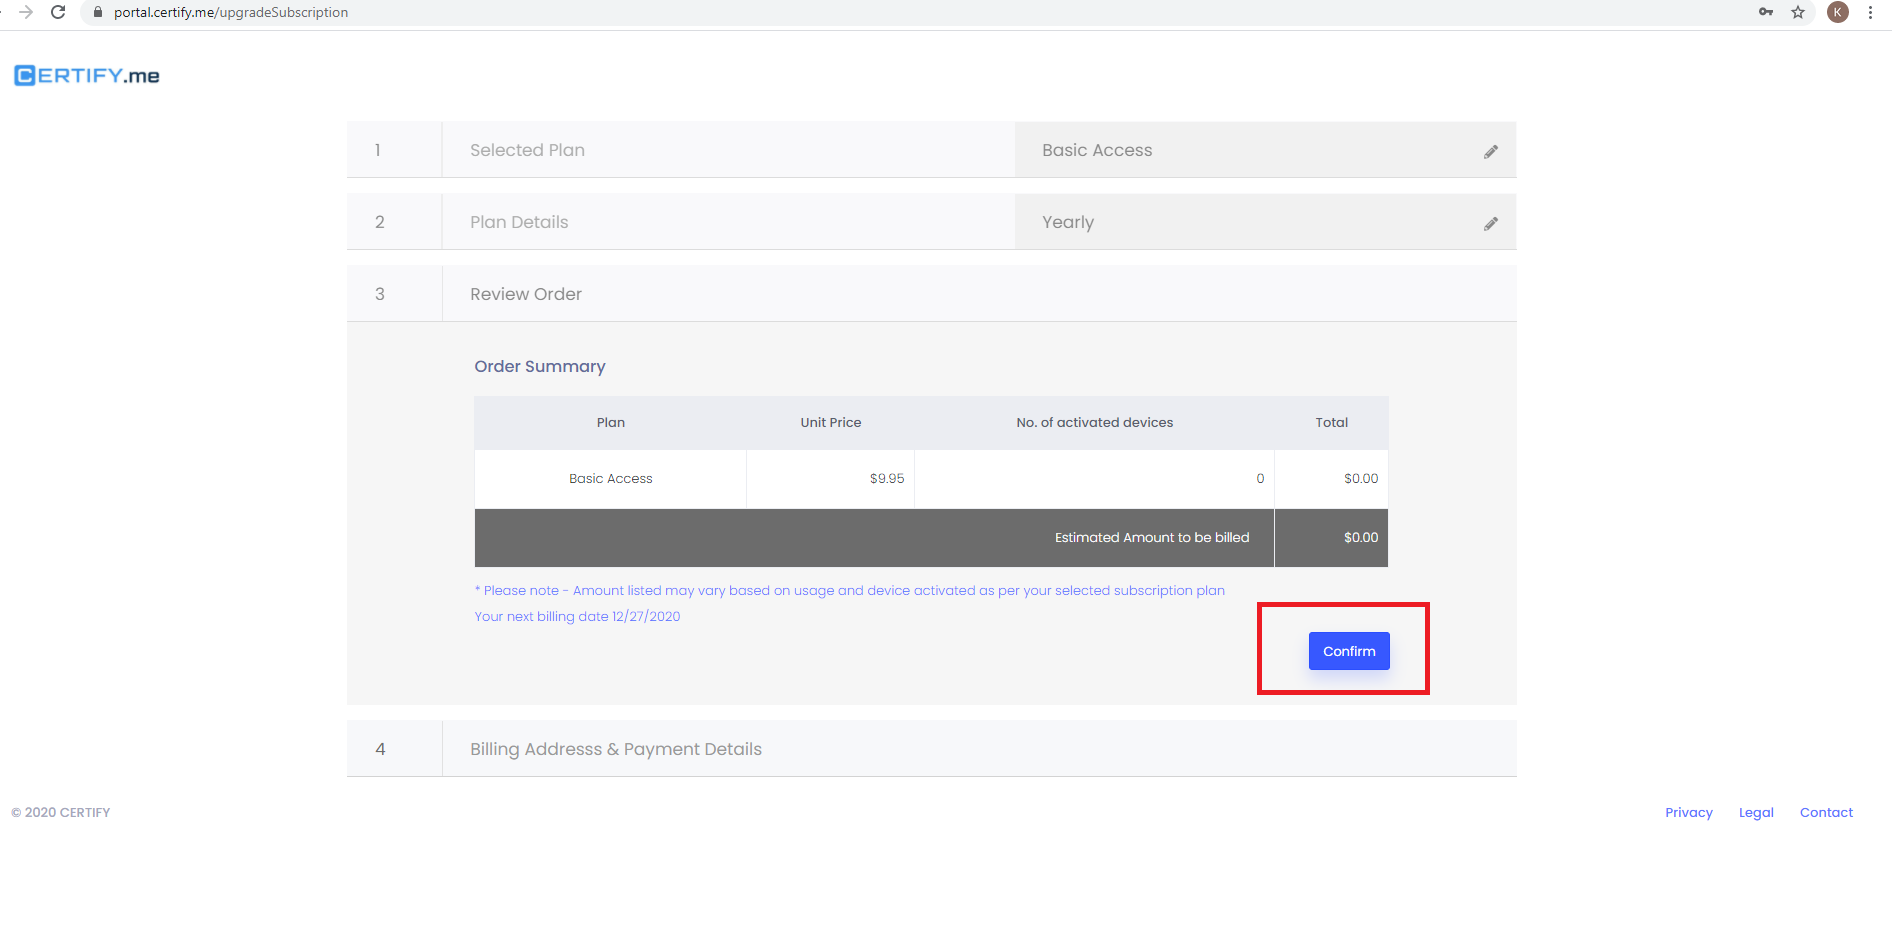
After this, the next step would take user to ‘Review Order’. Here user can see the plan cost and number of activated devices. Once confirmed, the next step would show the ‘Billing Address and Payment Details’.
Figure 1
Figure 2
Figure 3
Figure 4
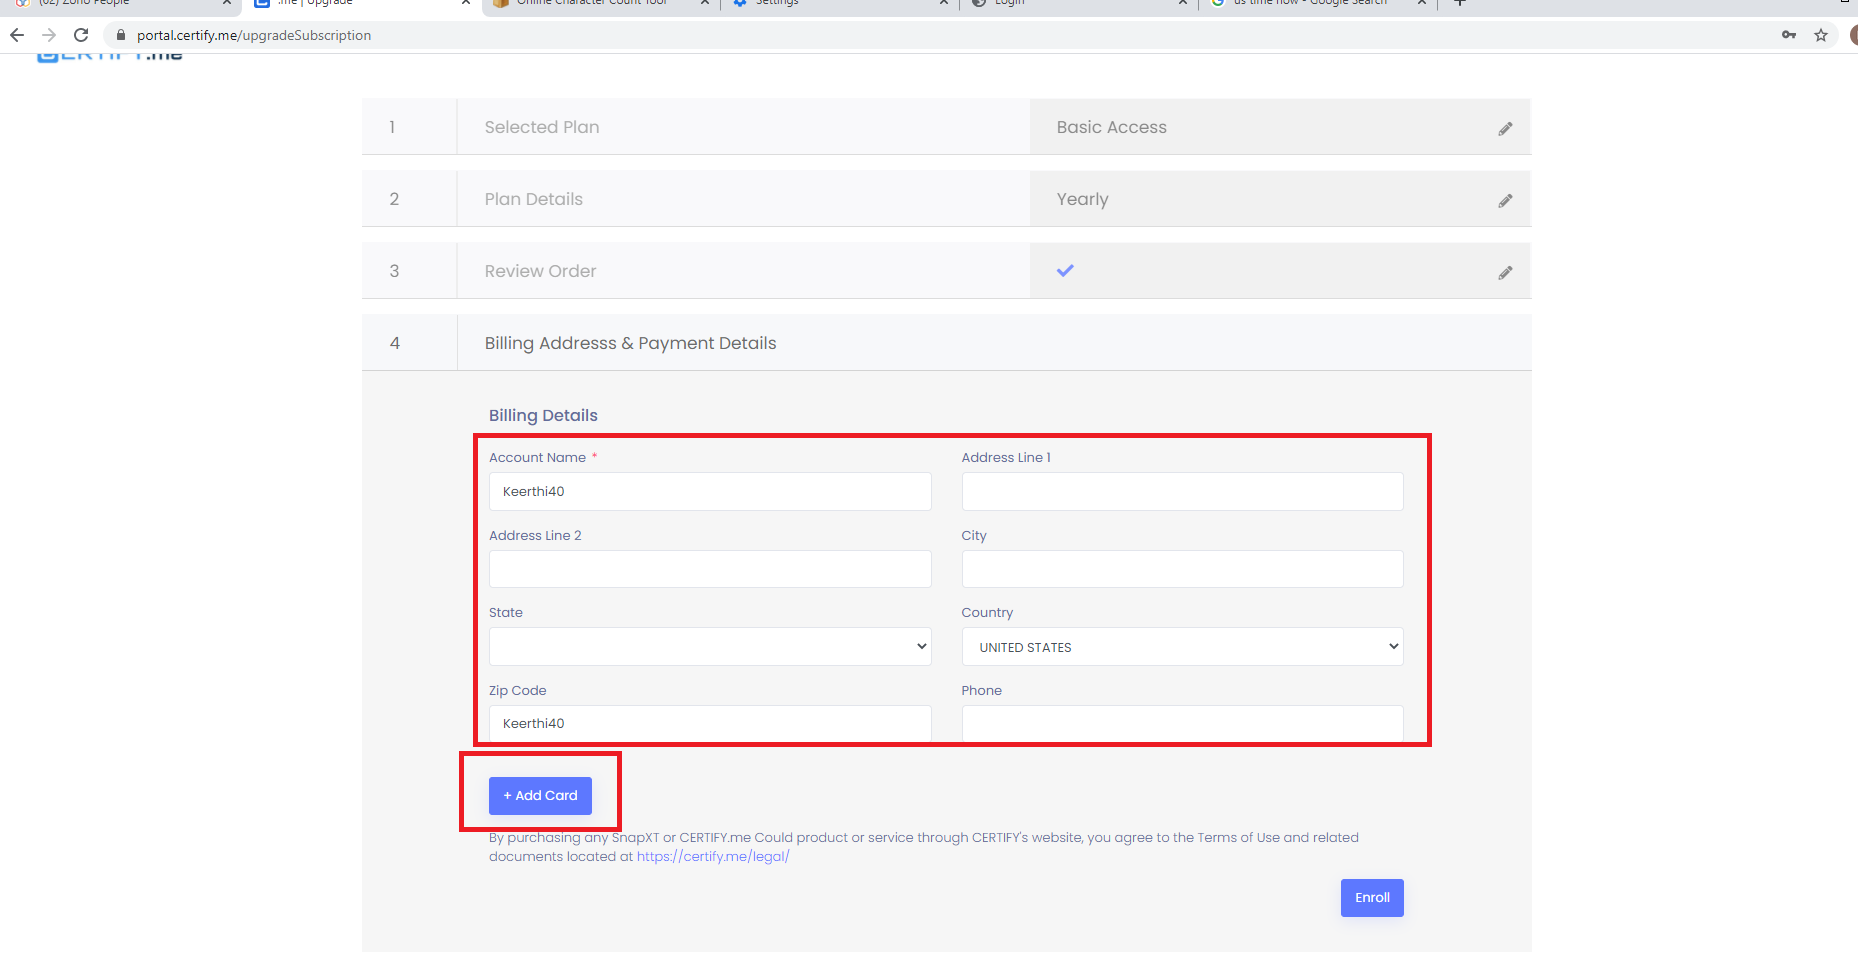
This section will pre populate the account owner details associated with the account.
-
Billing address can filled using the fields and Card details can be added using the option Add Card shown in Figure 5.
-
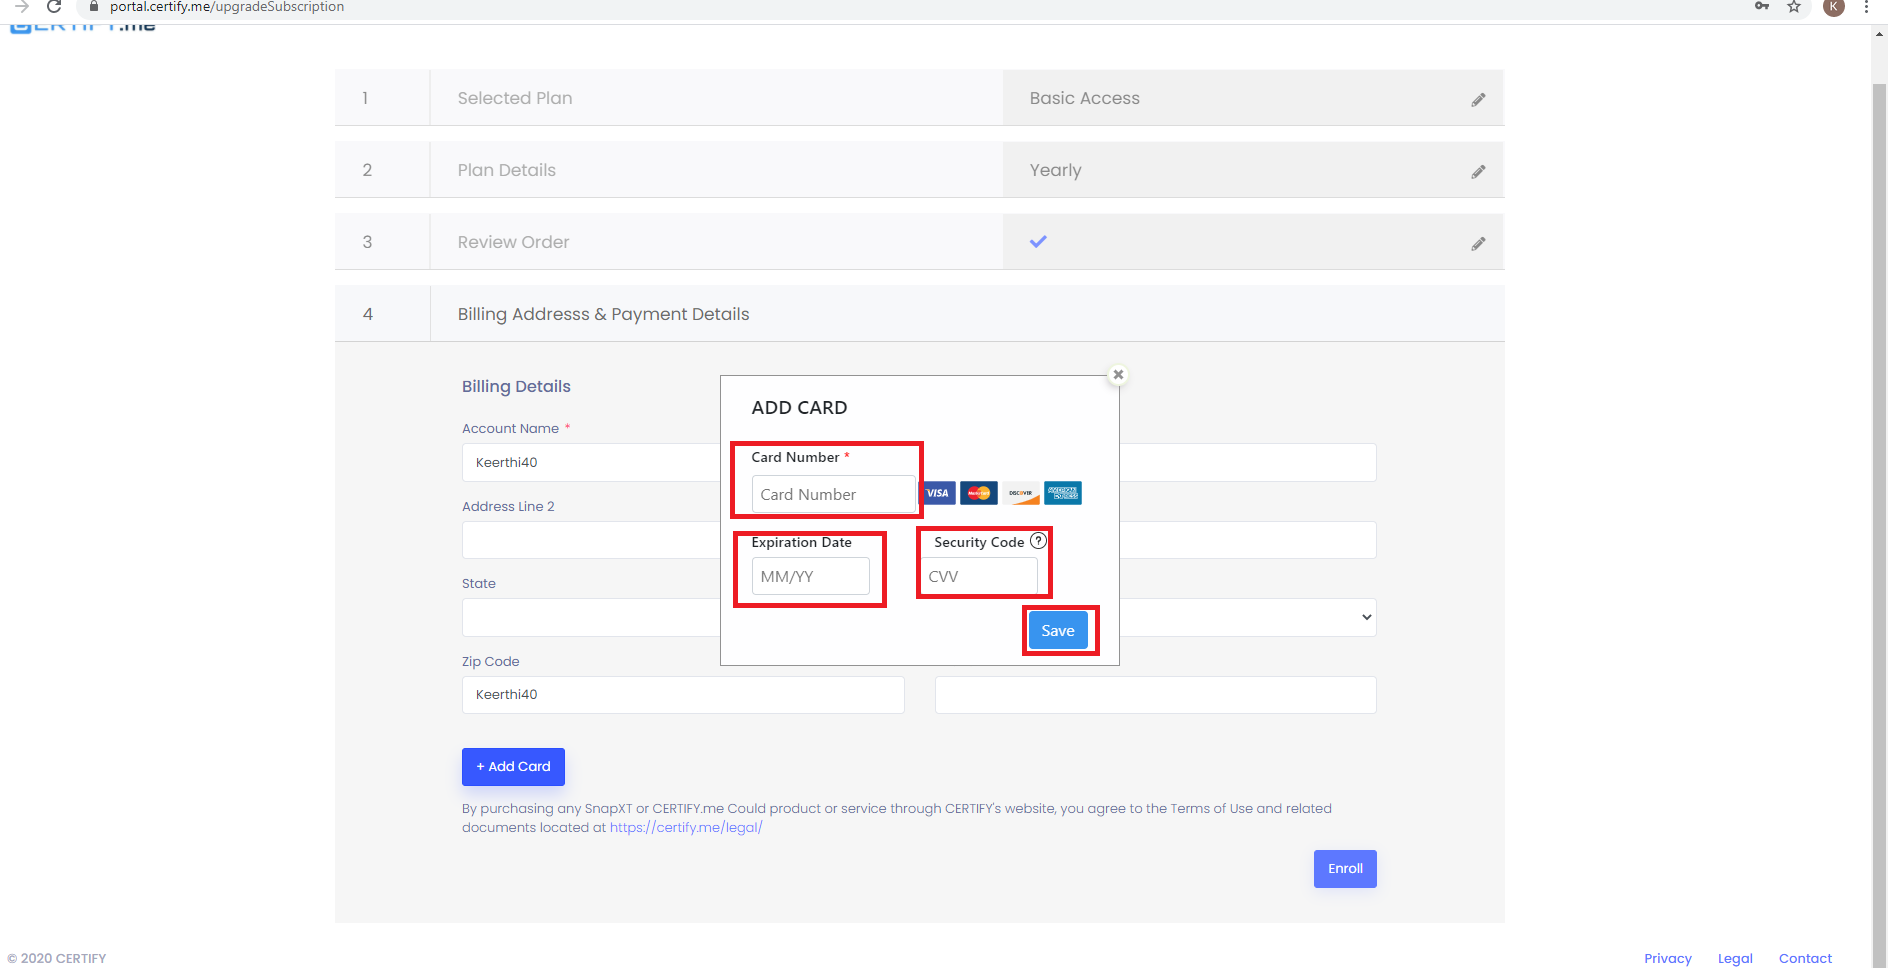
Add Card Pop Up appears where the card details can be filled and should be saved using the Save button as shown in Figure 6.
-
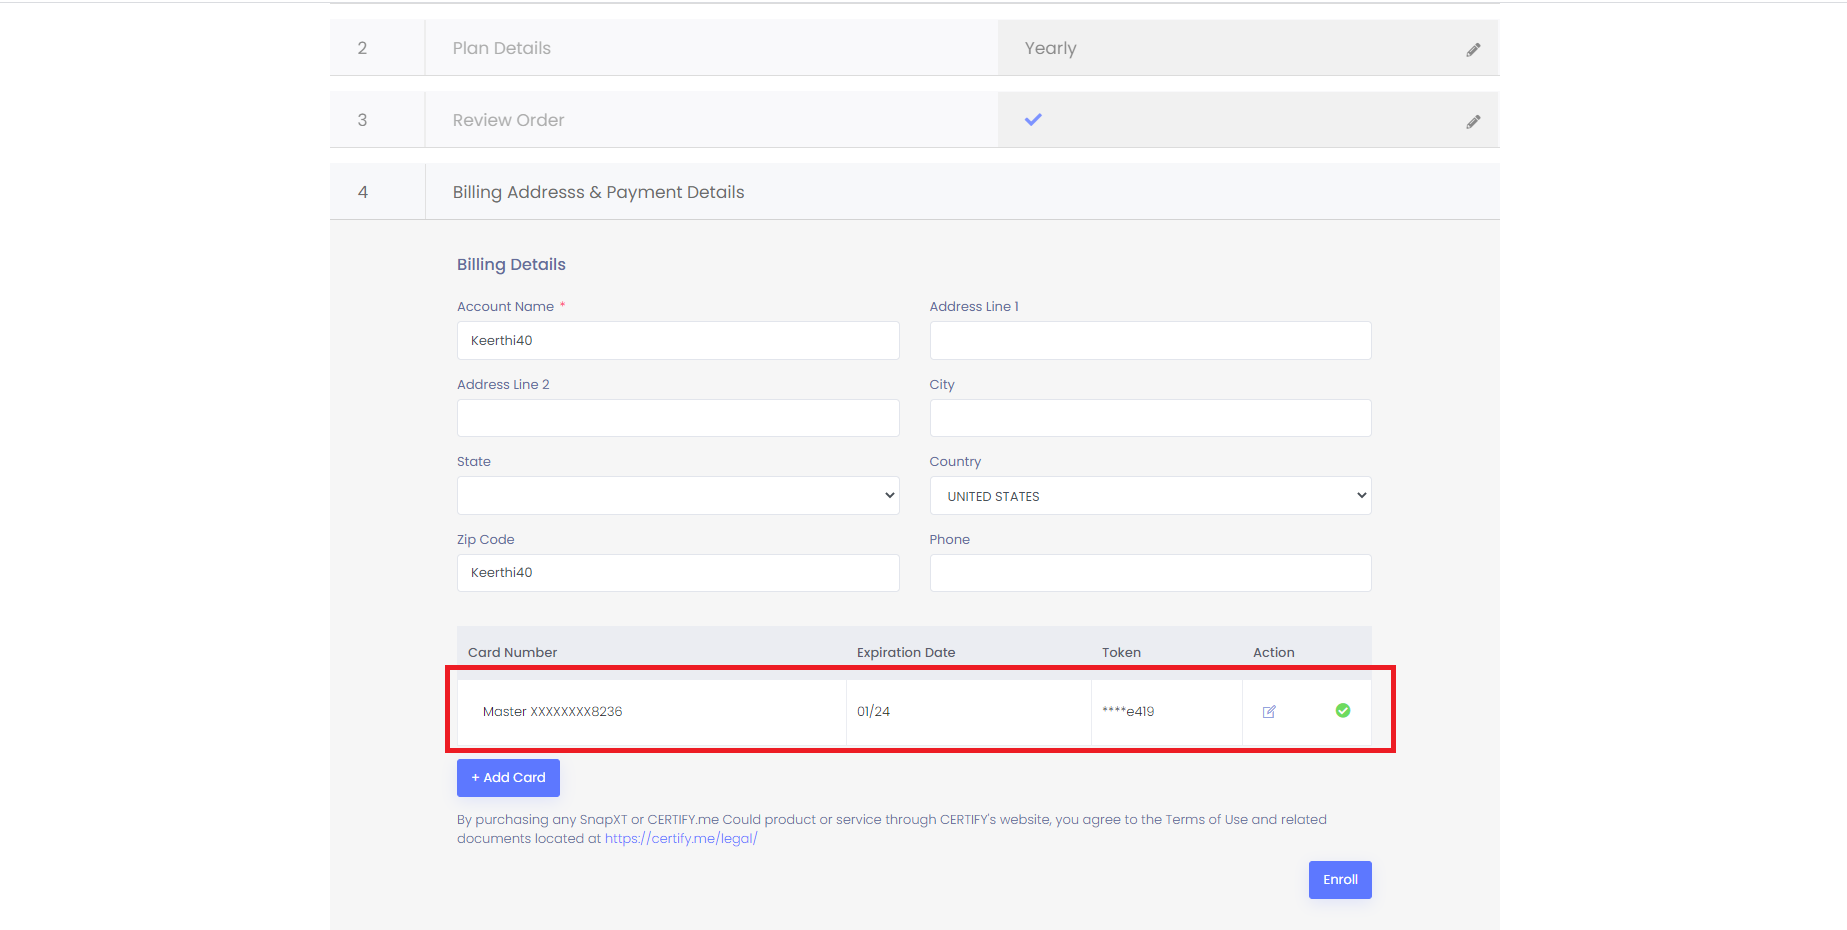
Added Card details will be displayed as shown in Figure 7.
-
More than 1 card can be added which will have an option to edit and delete. User can identify the default card by using the green check mark shown in Figure 7.
-
After Adding the Card details, Basic plan can be Enrolled by clicking on the Enroll button as shown in Figure 10. Once enrolled, user will receive the enrollment confirmation email on the registered account owner’s email which will have all the details about the enrolled plan, billing date, plan frequency etc.
-
After enrolling, the account owner will be redirected to ‘Manage Subscription’ page, which will show the enrolled plan details as shown in below image.
Figure 5
Figure 6
Figure 7
