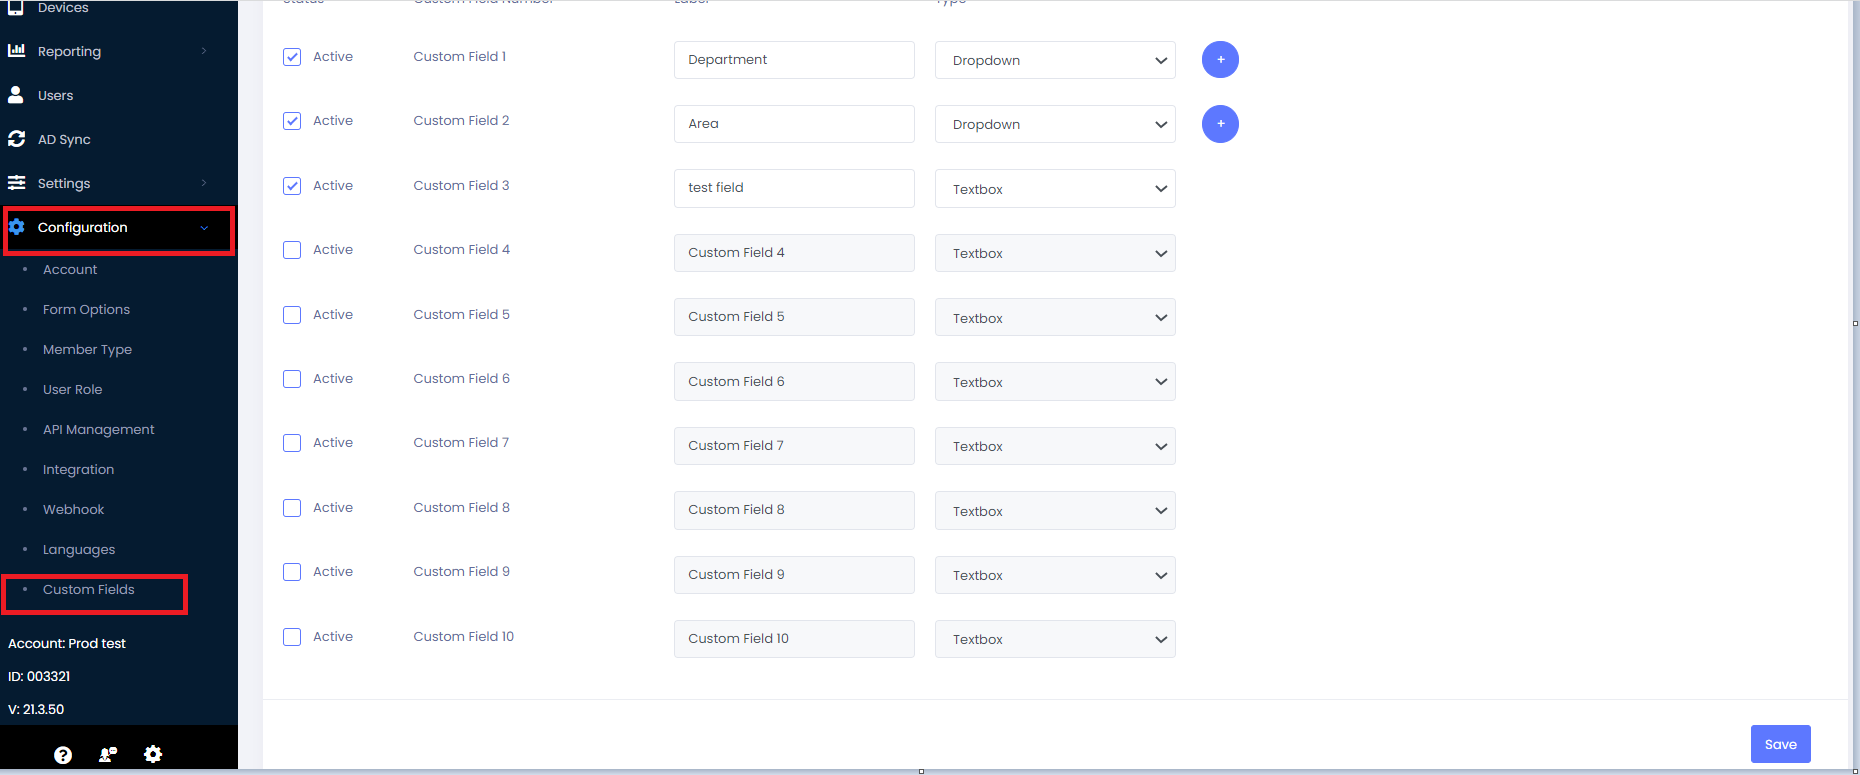
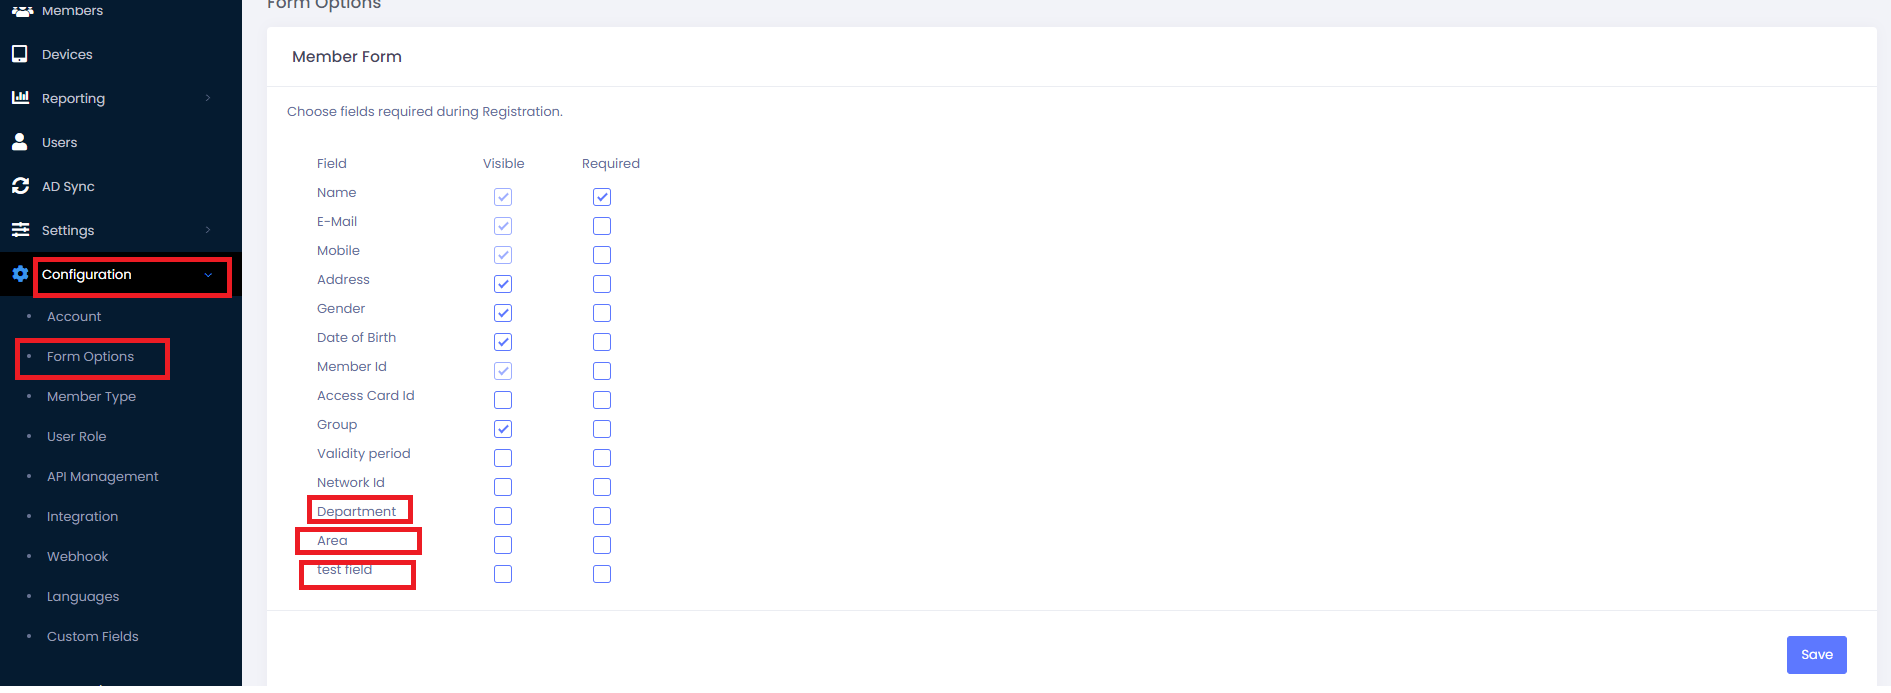
Custom Fields : This option allows users to add additional information while adding a member and in member information page during touchless registration flow as shown in Figure 1.
Custom fields of two types:
-
Text Box
-
Drop down box
Custom fields can be added in a form of Text box or Drop down box.
Steps to add Custom Fields:
-
Login to Portal.certify.me.
-
Click on Custom Fields option under Configuration.
-
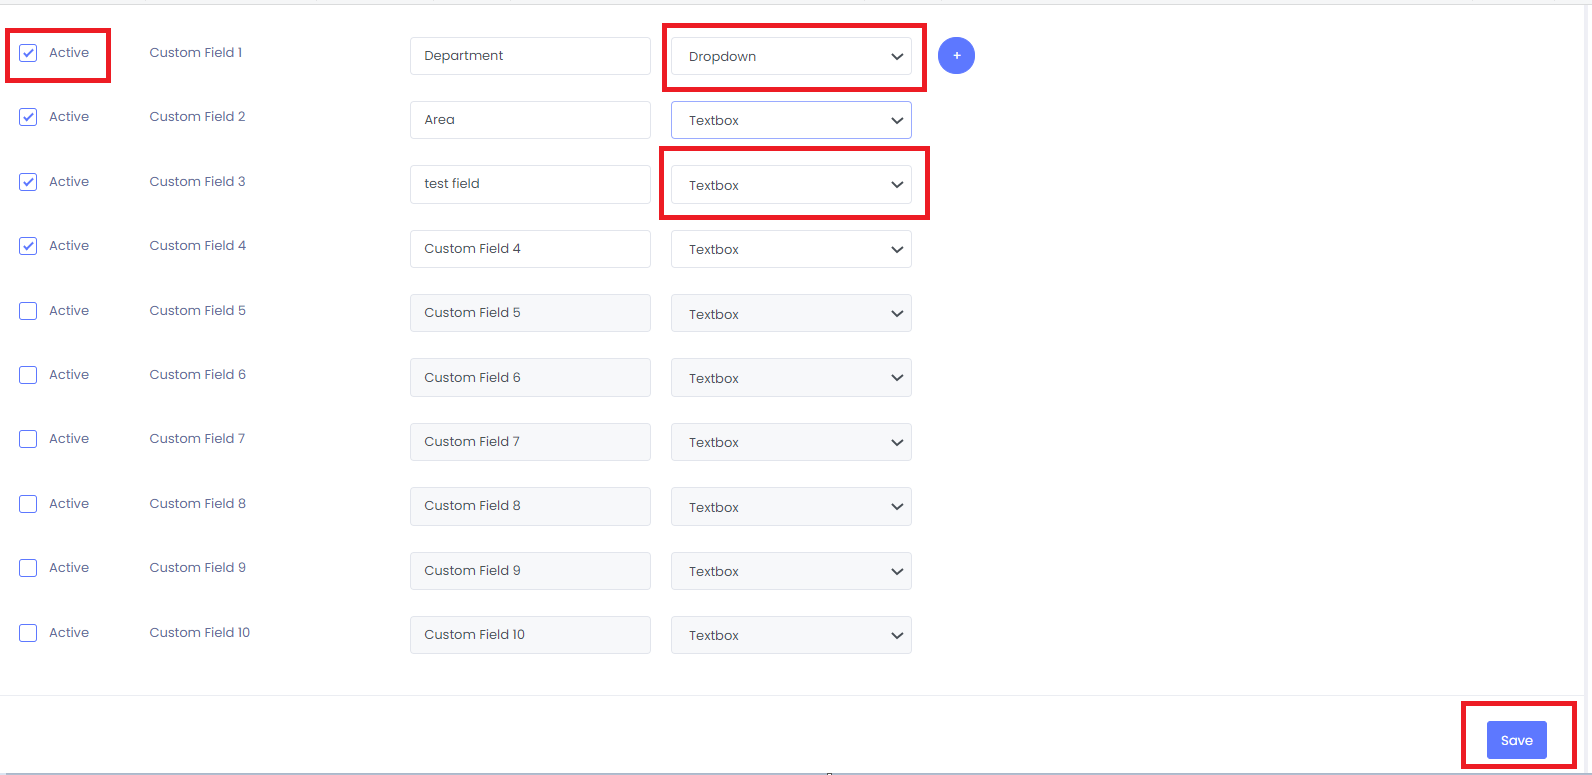
Enable Active check box and give label name for particular Custom filed.
-
Choose the Custom field type (Text box or Drop down).
-
Click on Save button as shown in Fig 2.
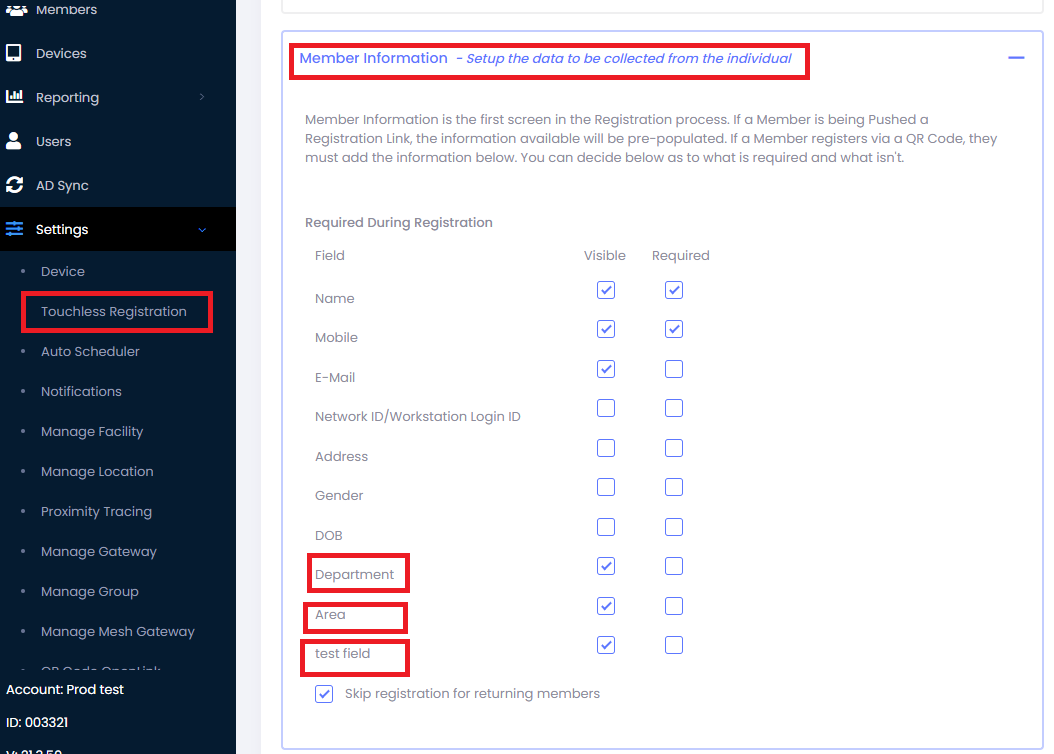
Note : Once the Custom fields are added, these fields will be Visible in Form options under Configuration & member information page in Touchless registration flow.
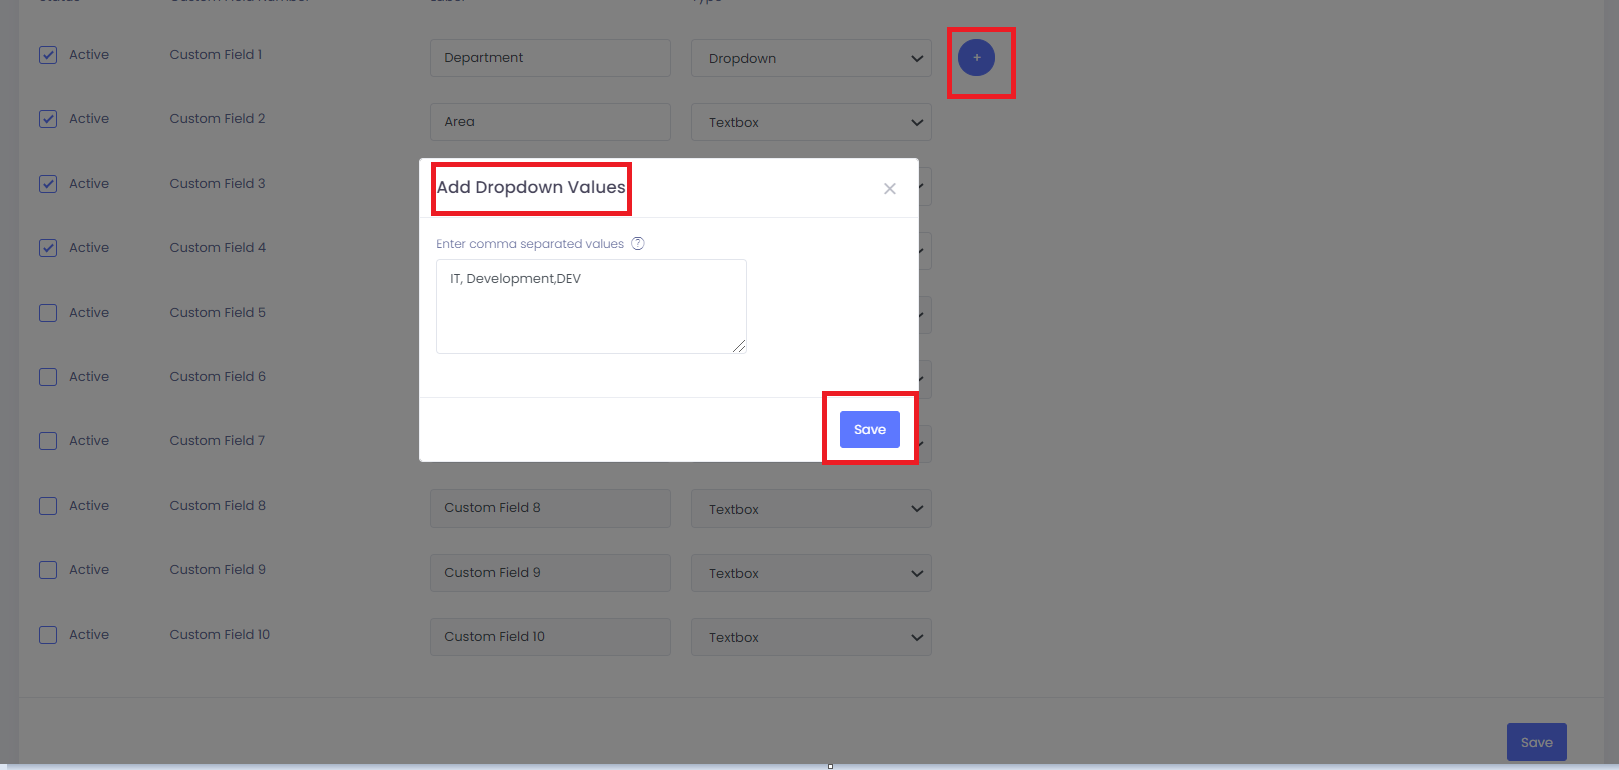
For Drop down type custom field click on add button as shown in Figure 3. Custom Values should be Separated by Comma and Click on Save button.
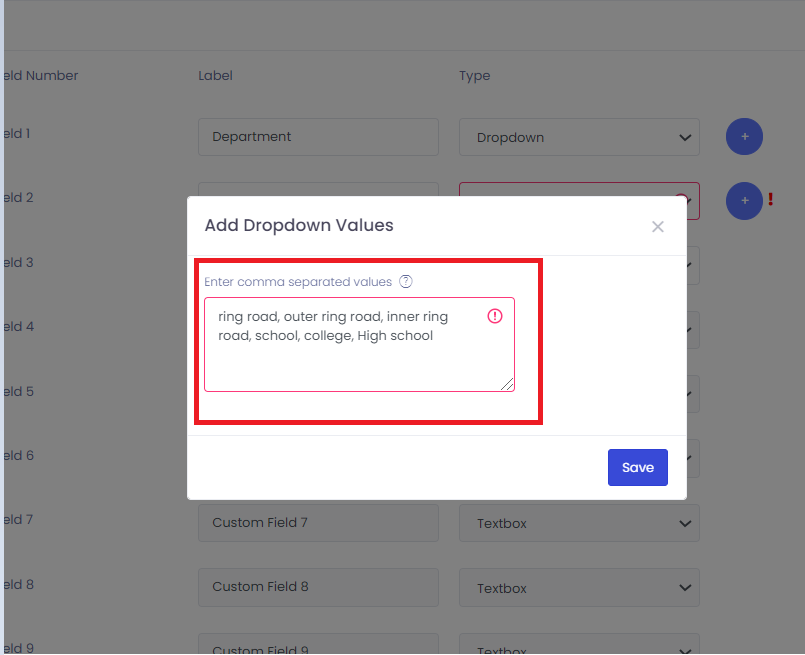
Note : Maximum 5 Comma Separated Custom values can be added. if limit Exceeds values will not be saved as Shown in Figure 3.1
-
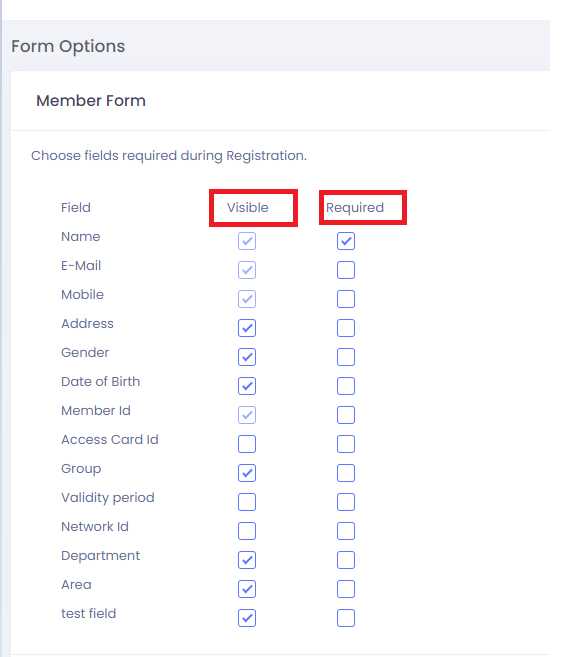
As above mentioned Once the Custom fields are added, it would be visible in Form options and member information page in Touchless registration as shown in Figure 4 .
-
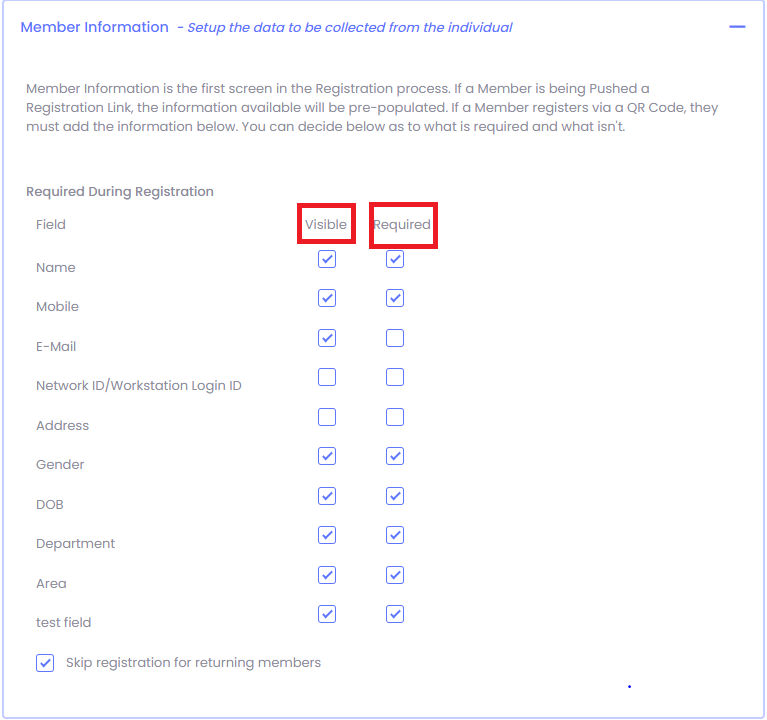
Added Custom fields in Member information page as shown in Figure 4.1
Custom Fields has Visible and Required check boxes in Form Options and Member Info under Touchless Settings as shown in Figure 4 and 5 :
-
Added Custom Fields have two check boxes Visible & required.
2. If Visible check box is enabled , Custom fields would be Visible while adding the member in member page & member information page during Snap app flow as Figure 4.1 & 4.2 and Custom fields will not be the mandatory
3. If Required check box is Enabled custom fields will be mandatory as shown in Figure 4.1
Address, Gender, Date of Birth & Custom fields in Export reports:
Address, DOB, Gender & Custom fields will be displayed in Member, Registration, Check in, & Member activity reports as shown in in Figure 6.
Gender, Date of Birth, Address & Custom Fields in Member Page:
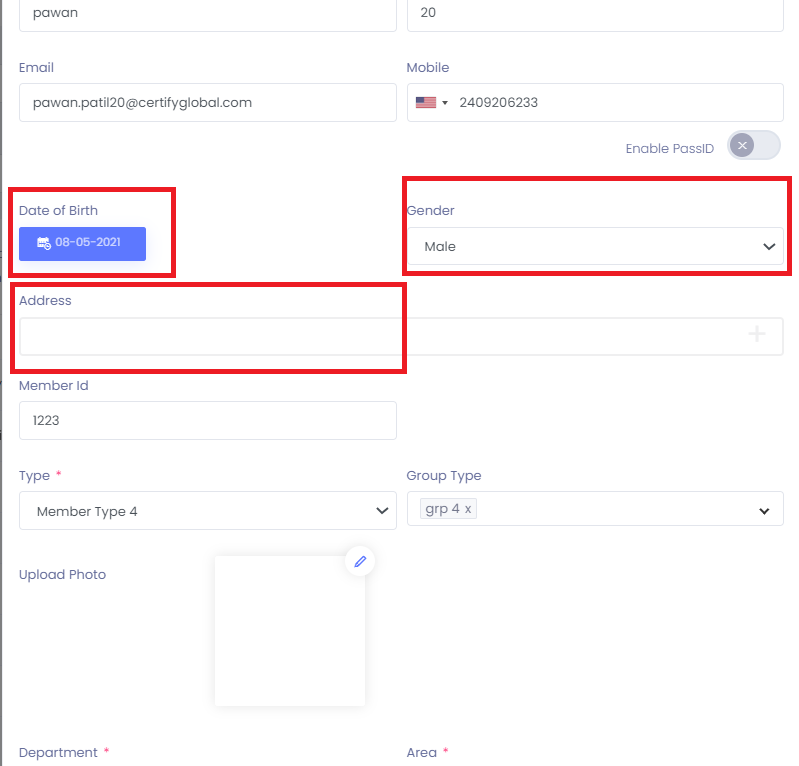
Gender, DOB , address , and Custom fields will be displayed while adding the member in member page if the options selected in Form options as shown in Figure 6.1
Figure 1
Figure 2
Figure 3
Figure 4
Figure 4.2
Figure 5
Figure 6
Figure 6.1
