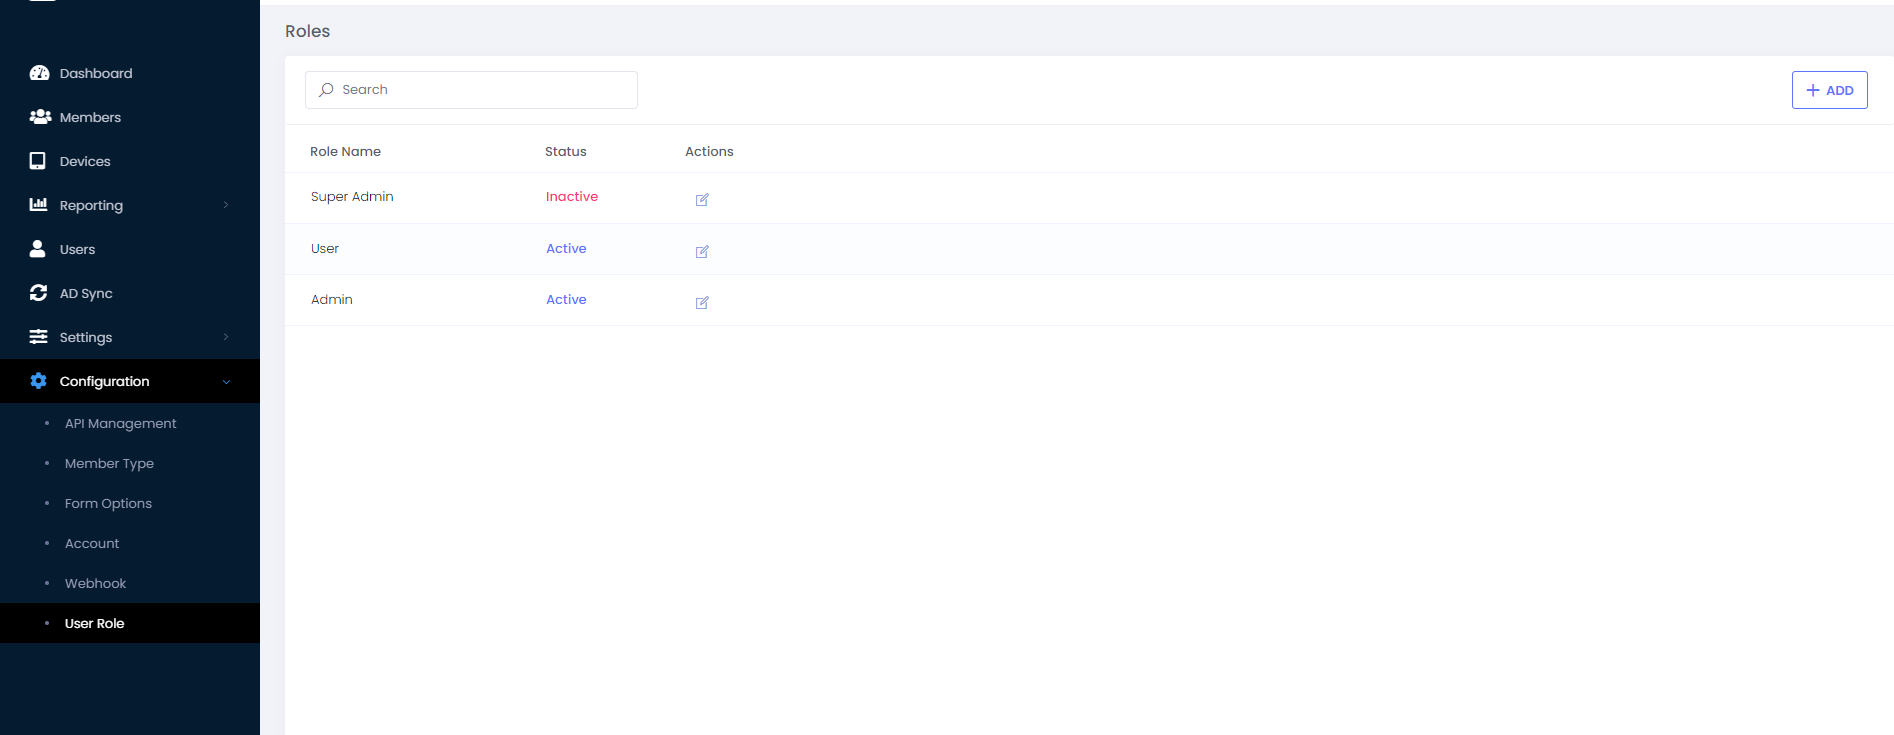
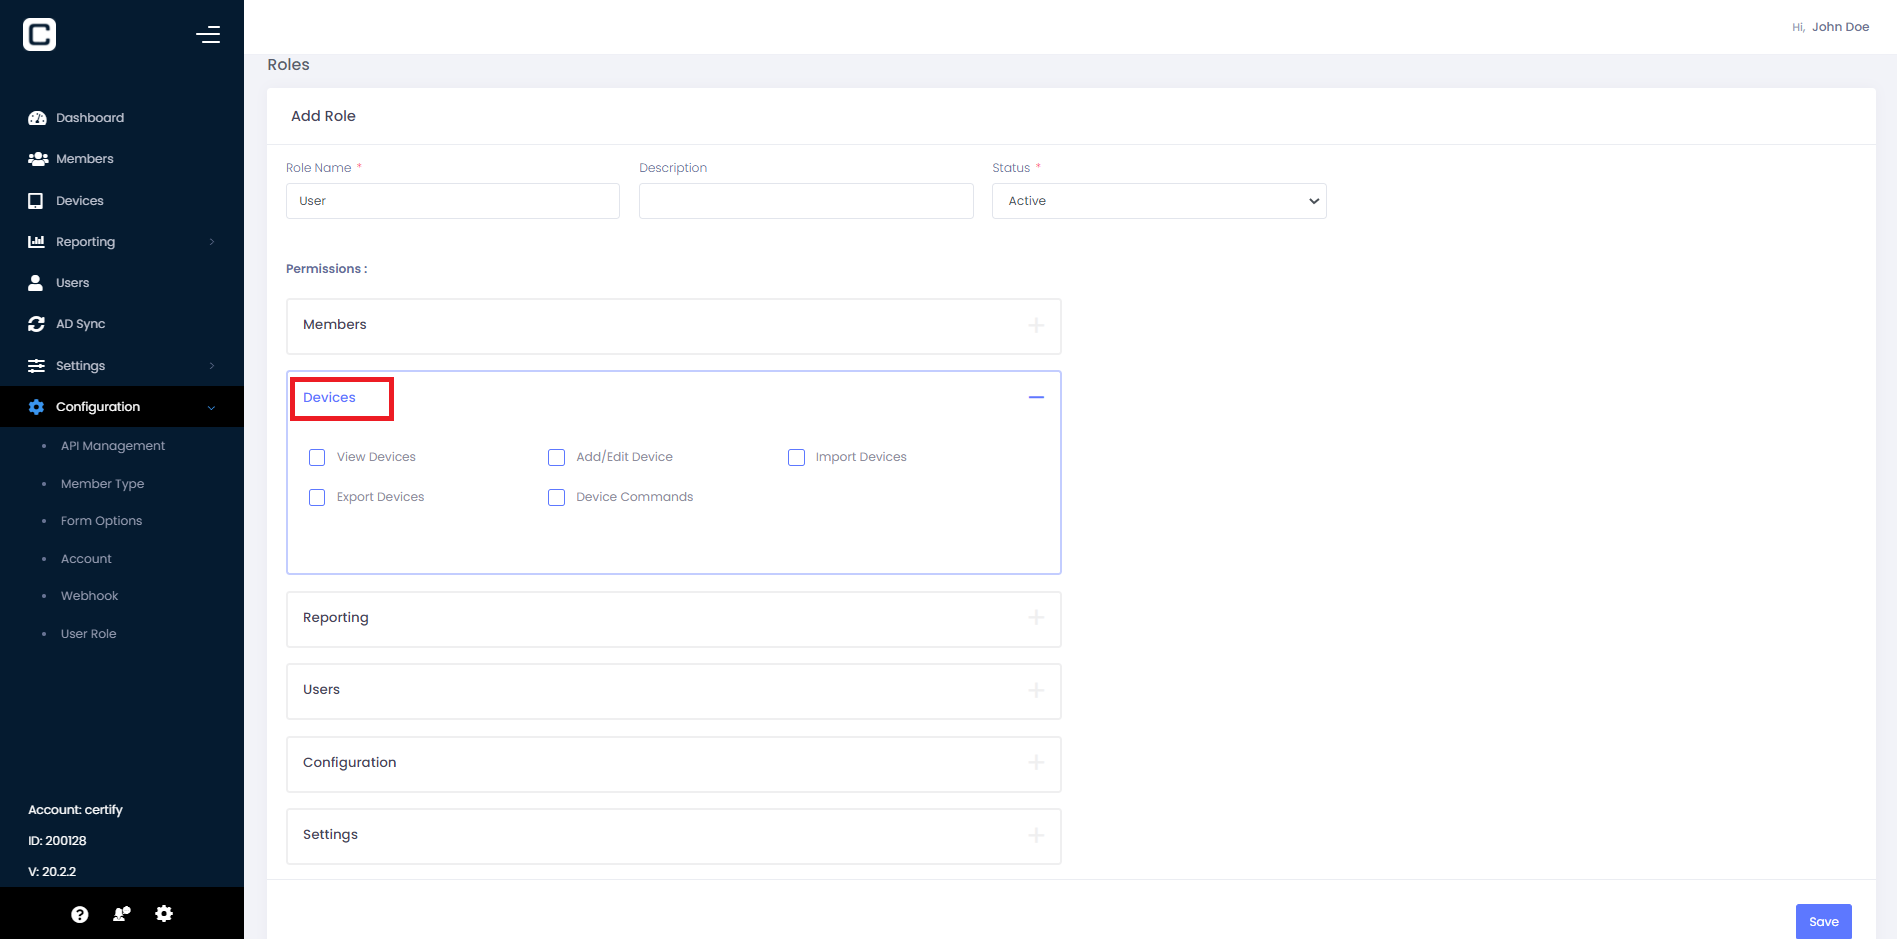
The User Roles page will display all the user roles created for that institution. The user can add a new role using the add button present at the top right corner. The user can edit the role by clicking on the action button available next to the role status.
To add a new role, click the ‘Add’ button and fill out the mandatory fields, those are Role Name and Status.
Role Name- Name to be assigned to a role.
Status- Status can be Active or Inactive.
The required permissions can be assigned to the role from the permission section.
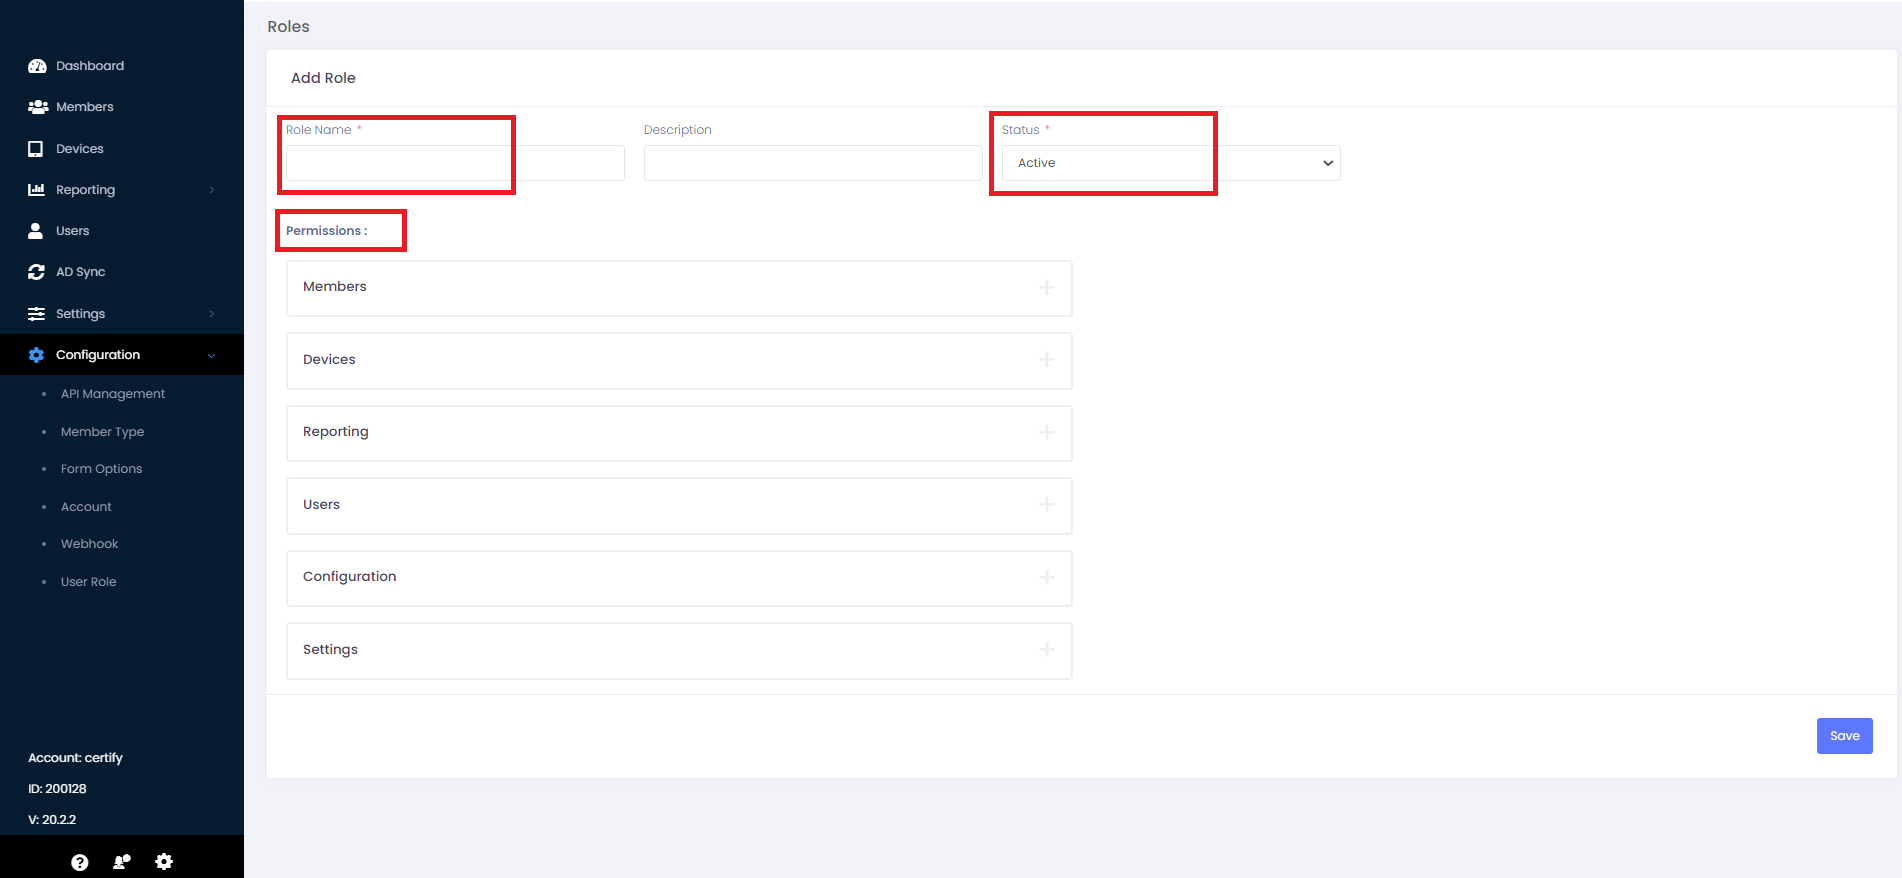
Permissions:
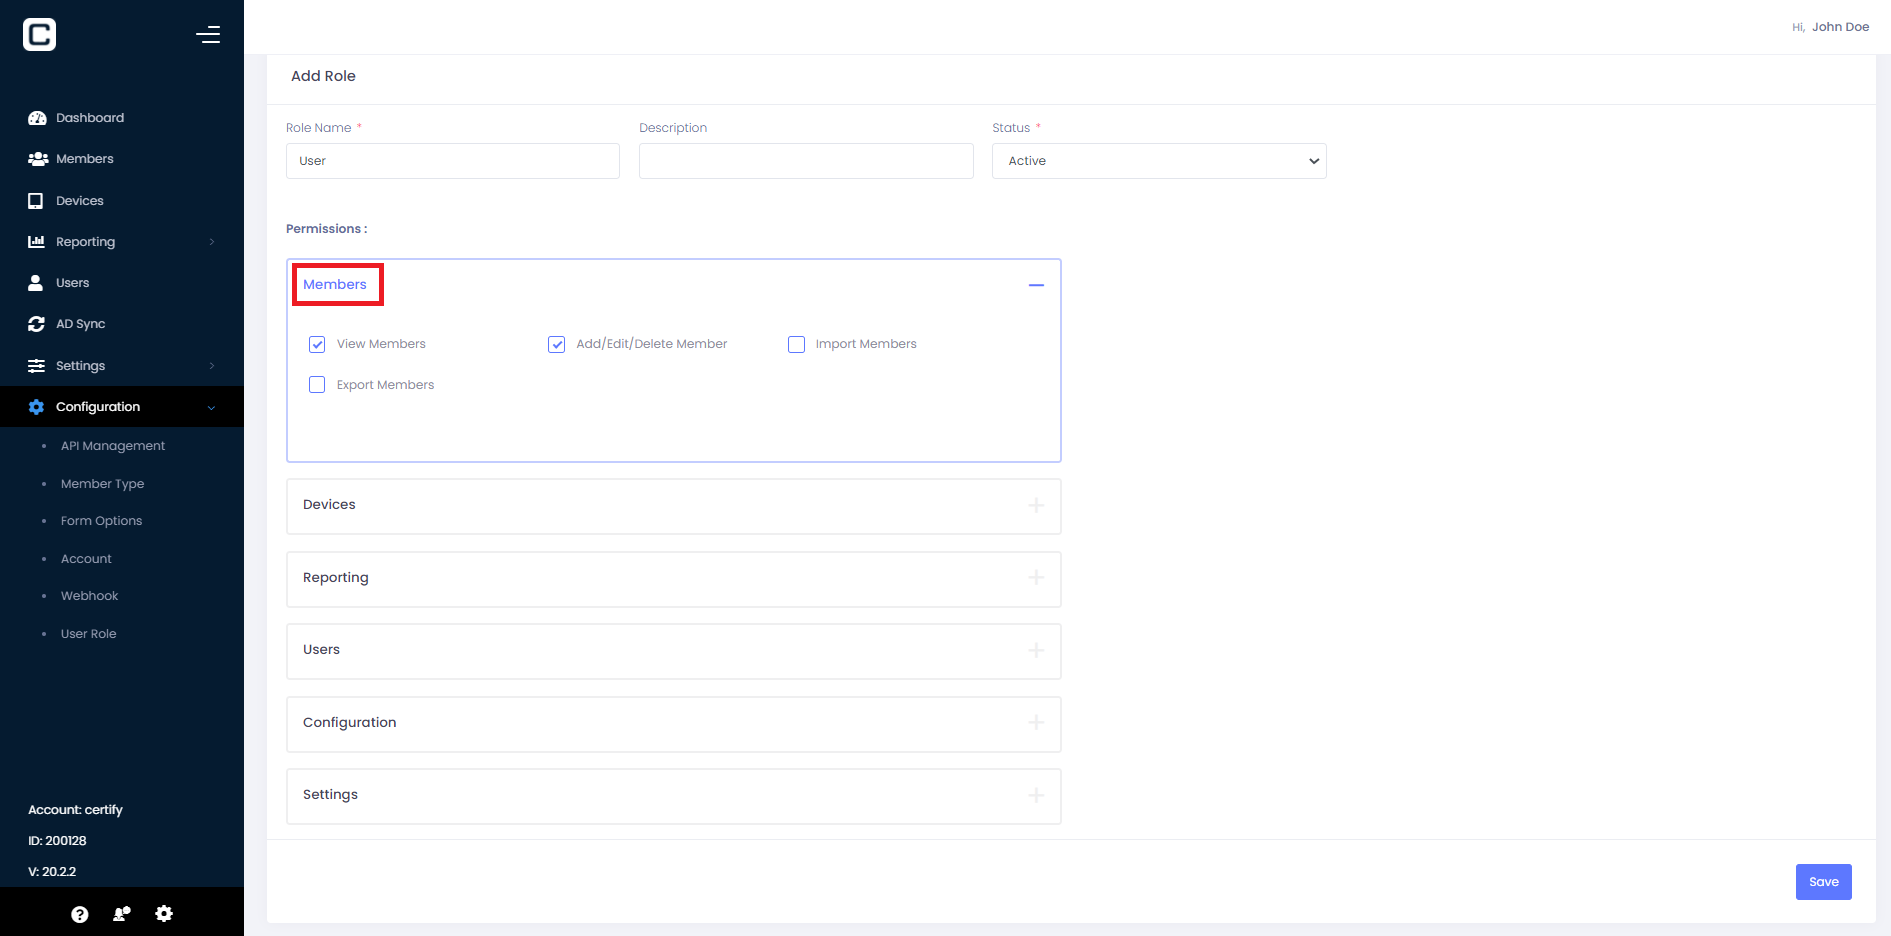
Members- Admin can choose/select the required ‘Members’ permissions to be assigned to a Role. It can be
-
View Members
-
Add/Edit/Delete Member
-
Import Members
-
Export Members
According to assigned permissions only user can perform the task.
For eg. If import permissions are not assigned to a role, he/she will not be able to import he members.
Similarly under Devices, there are permissions for;
-
View Devices- User can only view the added devices.
-
Add/Edit Devices- User can add a new device or can edit the device details.
-
Import Devices- User can import devices.
-
Export Devices- User can export the devices.
-
Device Commands- User have access to device commands.
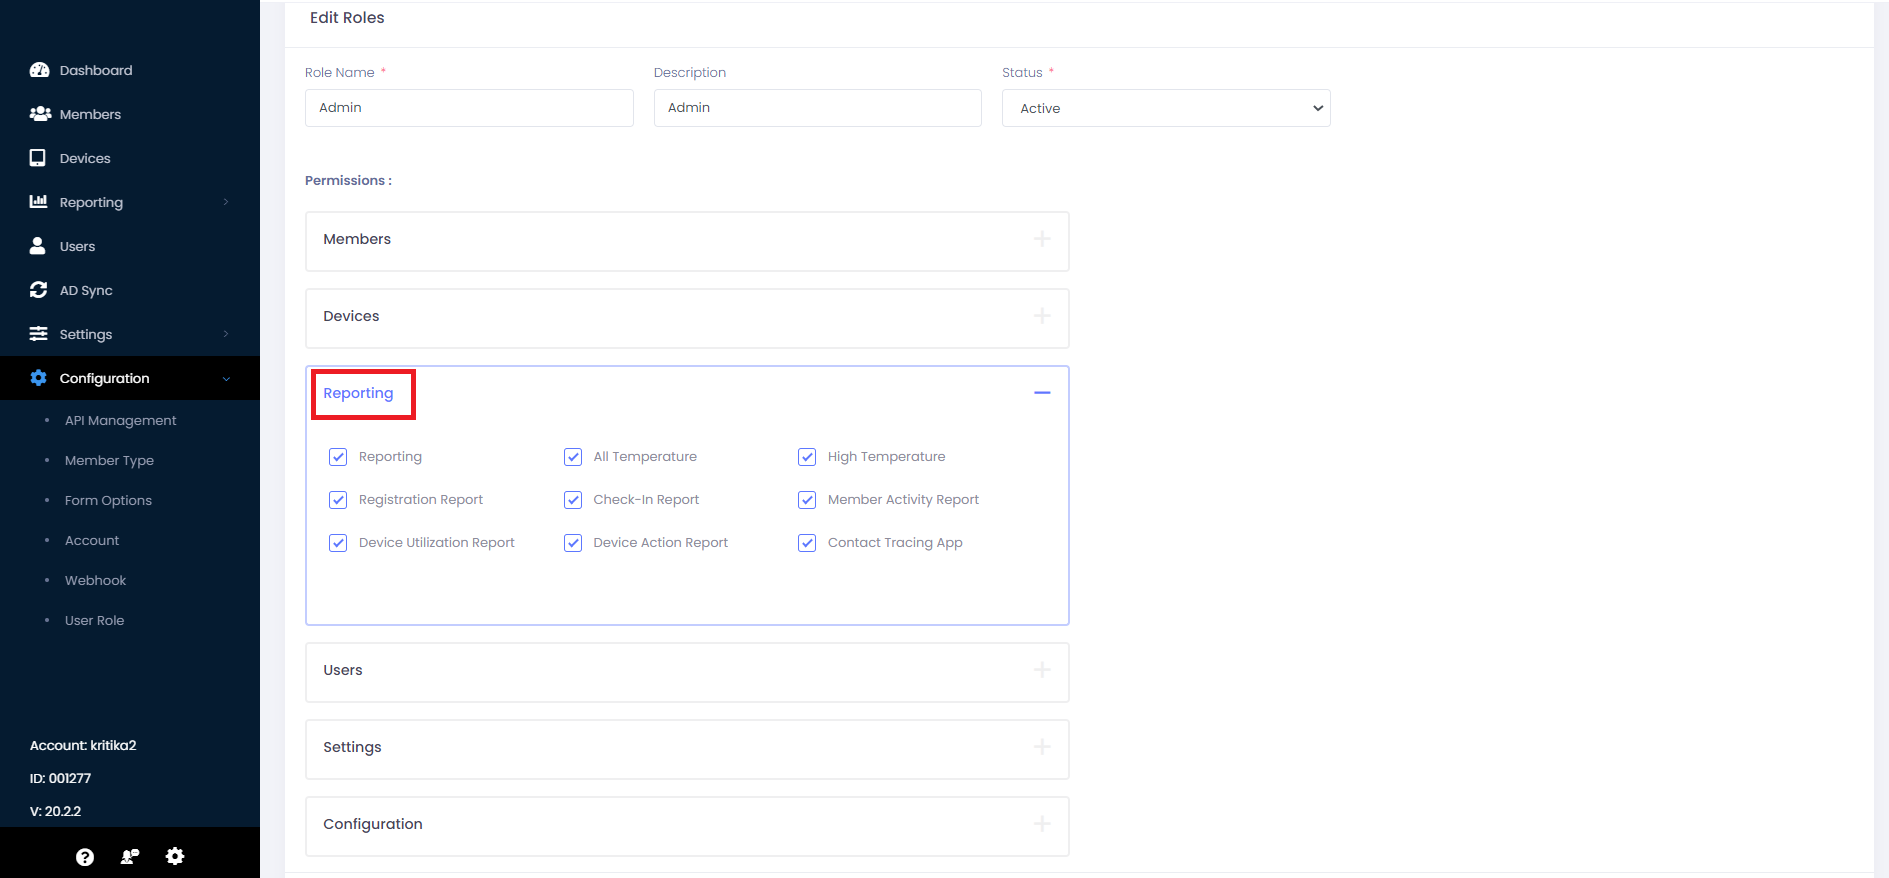
Reporting: Under reporting there are below permissions:
-
Reporting: If selected, Reporting will be displayed under left menu. If user unchecks this, the whole reporting menu will not be displayed to that specific role.
-
All Temperature
-
High Temperature
-
Registration Report
-
Check-in Report
-
Member Activity Report
-
Device Utilization Report
-
Device Action Report
-
Contact Tracing Report
If any of the above is selected, user will have access to those in Reporting menu.
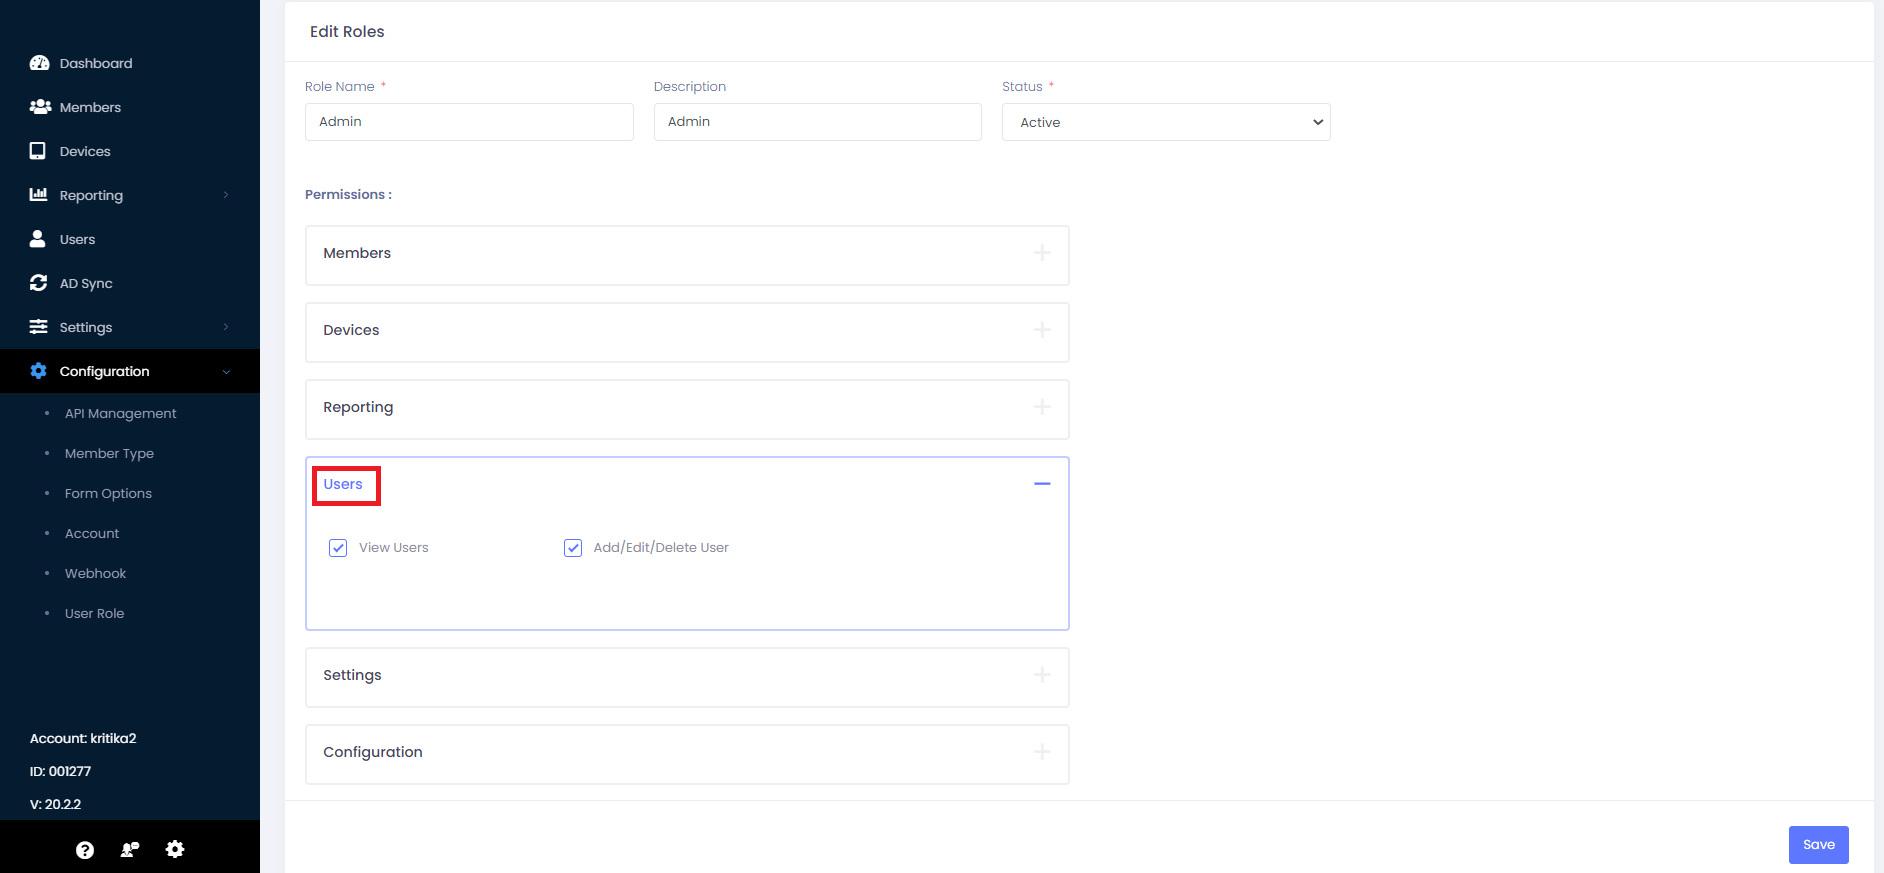
Users: From this section, admin can assign the permissions for View users or Add/Edit/Delete User.
-
View Users: User will have rights to view the all users.
-
Add/Edit/Delete User: User can add a new user, edit an existing user or delete a user.
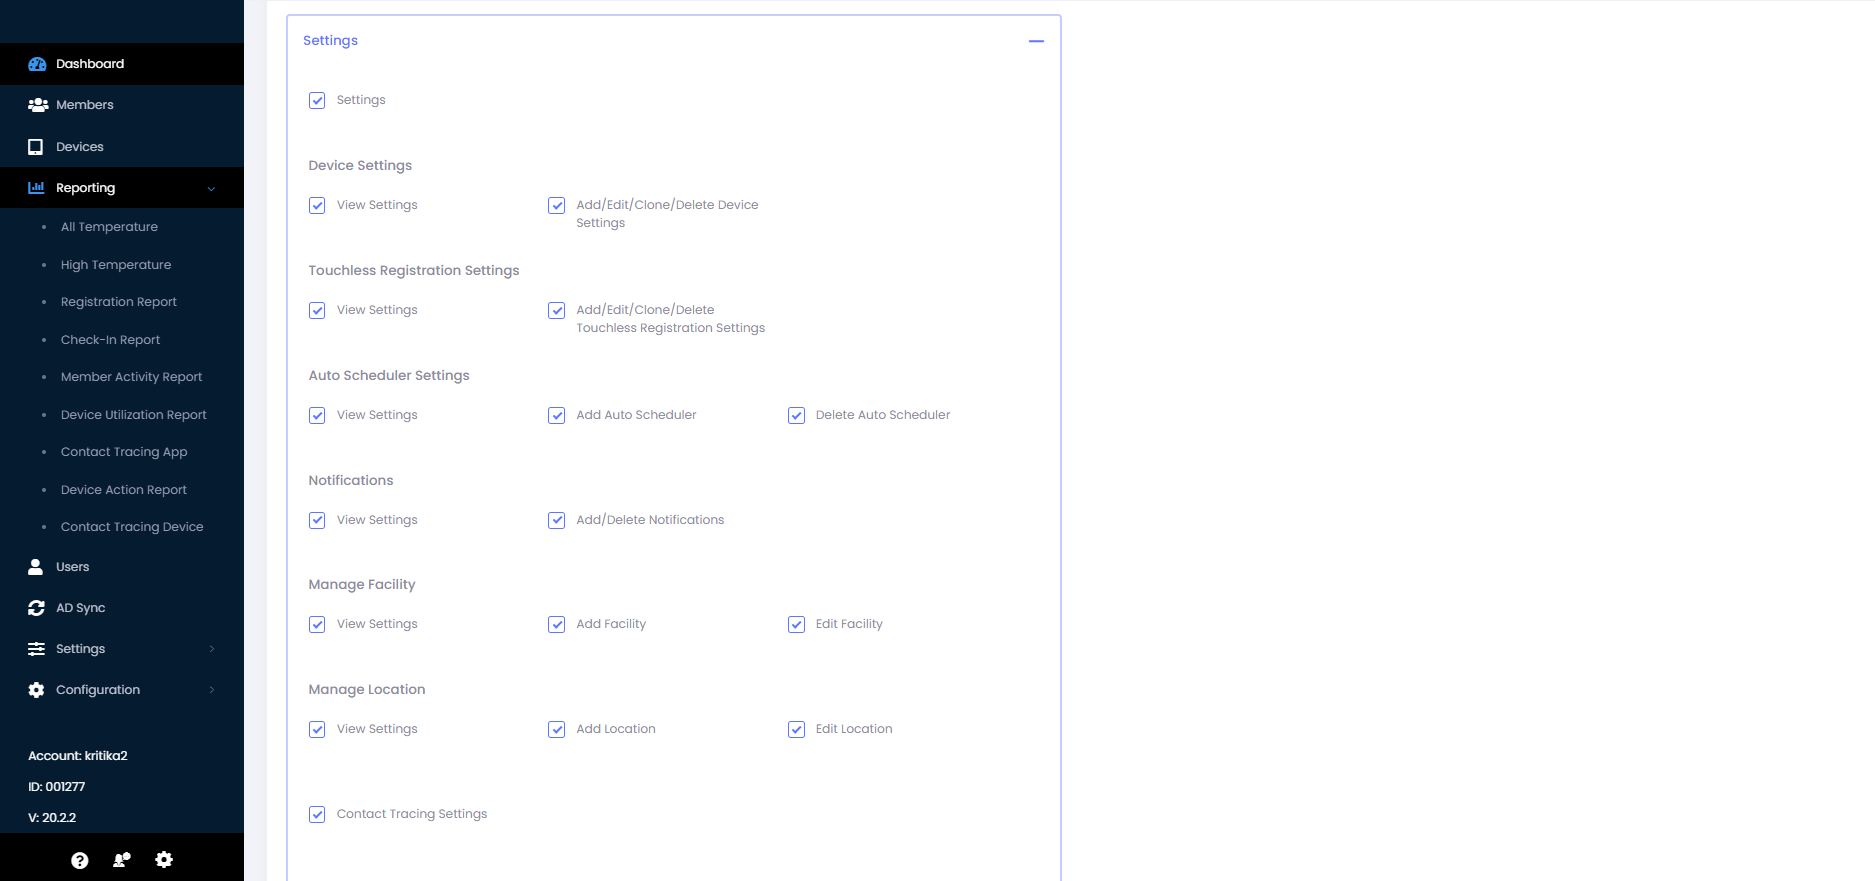
Settings: The attached figure shows the permissions for settings which are further categorized in below.
-
Settings- If selected then only user will have access to settings menu.
-
Device settings
-
Touchless Registration Settings
-
Auto Scheduler Settings
-
Notifications
-
Manage Facility
-
Manage Location
-
Contact Tracing Settings
Based on the above selection user role will have access to view/add/edit/delete permissions under each category.
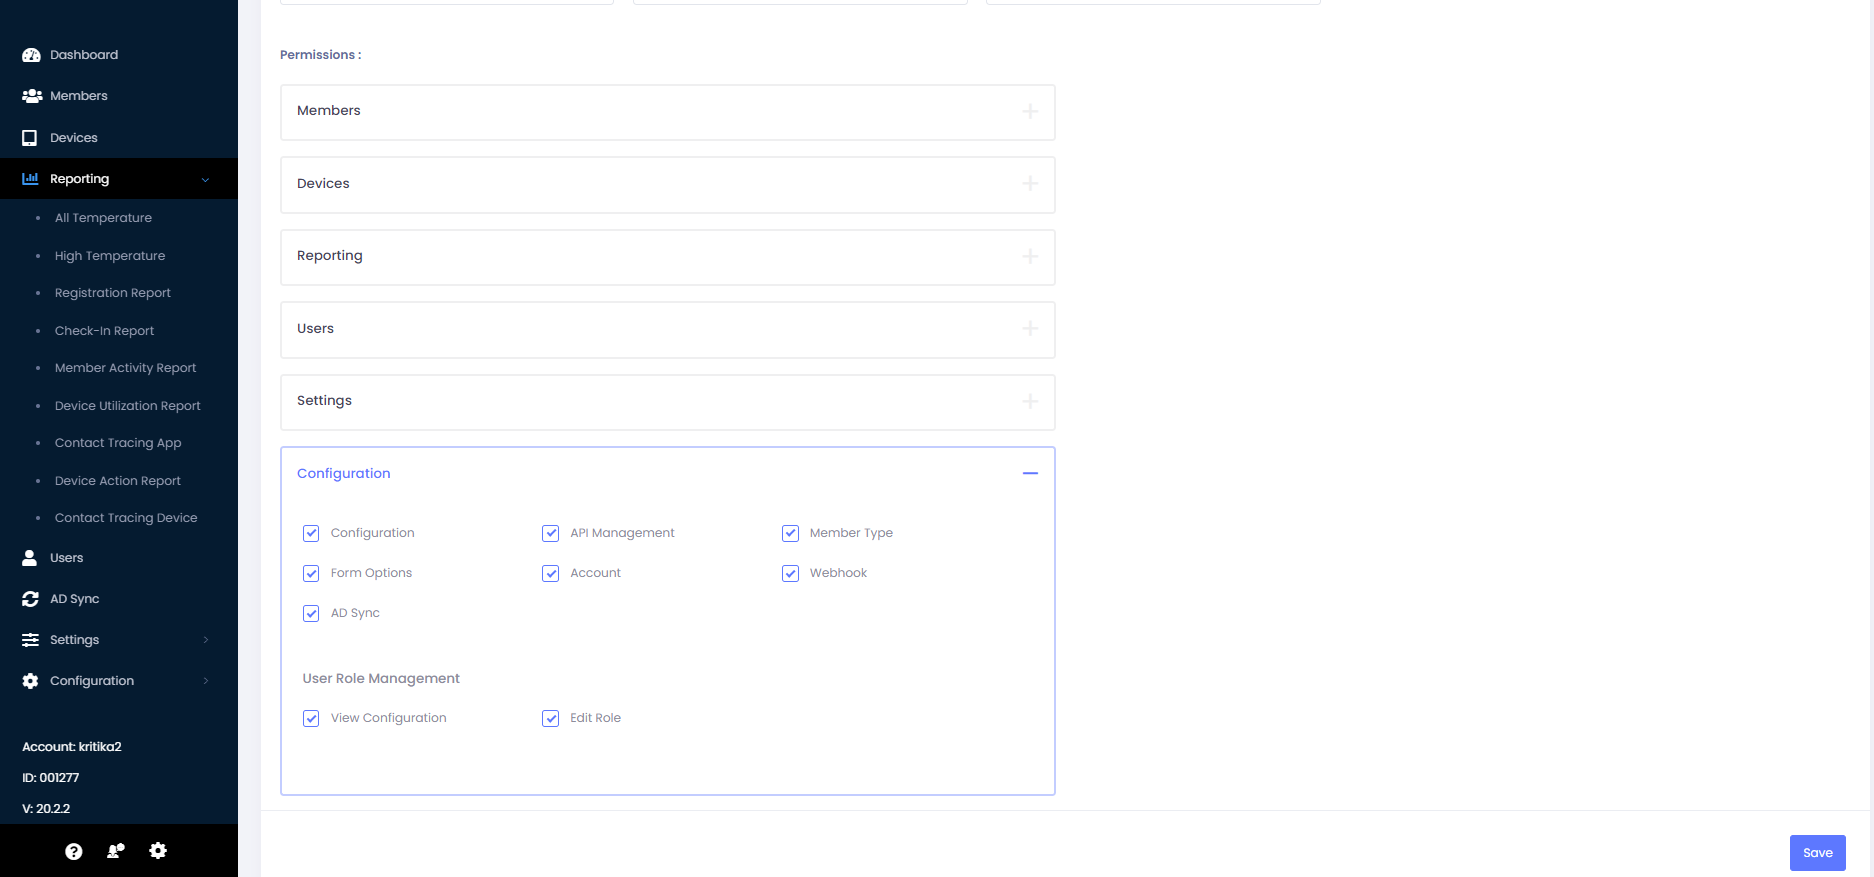
Configuration: All the permissions related to configurations fall under here.
-
Configuration- If selected then only user role will be able to see the configuration in left menu.
-
API Management
-
Member Type
-
Form Options
-
Account
-
Webhook
-
AD Sync
If any of above is selected from here then only user will have access or visibility of those configuration in portal.