Temperature Reading – Best Practices
The accuracy of the system depends on careful set-up and operation, as well as proper preparation of the person being evaluated.
Preparing the Area where You will Use a Thermal Imaging System
-
Room temperature should be 68-76 °F (20-24 °C) and relative humidity 10-50 percent.
-
Try to control other items that could impact the temperature measurement:
-
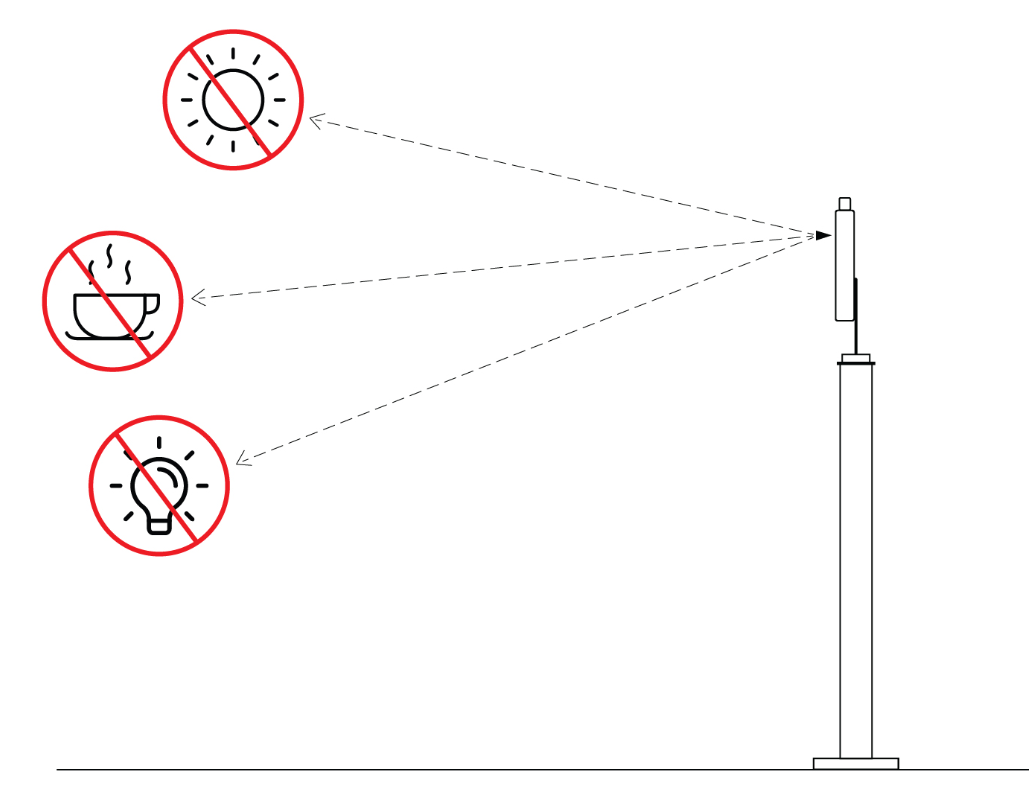
Avoid reflective backgrounds (for example, glass, mirrors, metallic surfaces) to minimize reflected infrared radiation.
-
Use in a room with no draft (movement of air), out of direct sunlight and away from radiant heat (for example, portable heaters, electrical sources).
-
Avoid strong lighting (for example, incandescent, halogen and quartz tungsten halogen light bulbs).
-
-
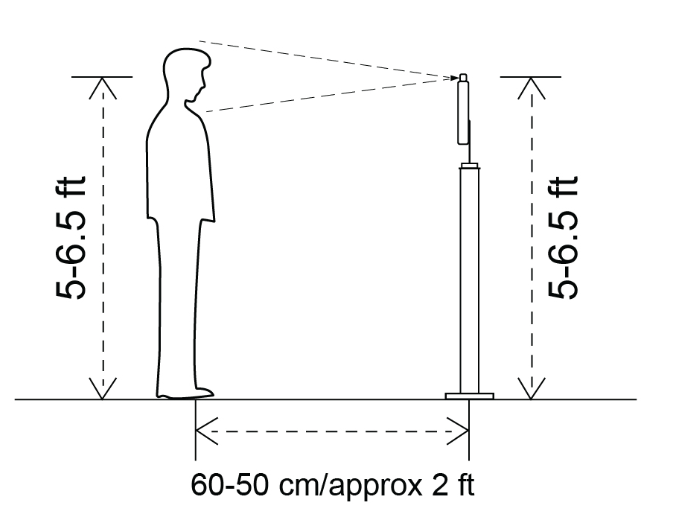
Mark area on a floor at 50 cm from the device, so the person knows where to stand for a temperature scan.
The system temperature threshold should be set at 99.5 °F
The device measures the skin surface temperature. And can be typically lower than body temperature by 1 degree.
The accuracy of the device is ± 0.5 °F
Best practices to get right temperature:
-
Please make sure the device is in a covered place. There shouldn’t be any direct sunlight, check installation environment.
-
Make sure the user is reading the temperature when they are near the device at a distance of about 50 cm/ approx. 2ft . To enforce this, Enable “allow scan on close proximity” under Settings → Scanview settings.
-
If there are extreme heat or cold conditions outside when the user walks in to the location, they need to adjust to the room temperature before they take a scan.
-
Under certain circumstances, environments where the device is placed can play a factor in temperature reading. In this case, it is recommended to use an FDA approved handheld thermal scanner and measure the temperature side by side with the snap device. If there is a difference, you can compensate by the +/- values in the Temperature Compensation to reflect the actual reading.
Preparing the Person Being Evaluated
-
Does not have any face obstructions before measurement (such as a mask, glasses, hat, headband, or scarf), the person’s hair is pulled away from the face, and the person’s face is clean and dry.
-
Does not have a higher or lower face temperature from wearing excessive clothing or head covers (for example, headbands, bandanas) or from using facial cleansing products (for example, cosmetic wipes).
-
Has waited at least 15 minutes in the measurement room or 30 minutes after exercising, strenuous physical activity, bathing, or using hot or cold compresses on the face.
Limitations of Thermal Imaging Systems
-
These systems measure surface skin temperature, which is usually lower than a temperature measured orally. Thermal imaging systems must be adjusted properly to correct for this difference in measurements.
-
These systems work effectively only when all the following are true:
-
The systems are used in the right environment or location.
-
The systems are set up and operated correctly.
-
The person being assessed is prepared according to instructions.
-
Troubleshooting steps for getting the Snap XT device online
– Initial step is to enable the navigation bar in the device. There are 2 steps for this process:
OPTION 1: Through CERTIFY SNAP Application
-
Launch the CERTIFY Snap application and once it is displayed on the screen, tap and hold on the top-left corner.
-
Enter the password when directed to the login page. The password should be the last 6 digits of the device serial number.
-
Click on the Device Settings, there will be an option to enable the navigation bar. Device Settings → Show Navigation Bar.
-
After this, click on Save option and then close.
OPTION 2: If you are on the CERTIFY home screen
-
Pull the notification area from the top.
-
Click on the gear button on the top-right corner.
-
Scroll down to Display option and click on the “NavigationBar & StatusBar”
-
In this setting, check the “show the navigation bar” and after that the navigation bar should be enabled to operate.
-
The flow: Settings → Display → NavigationBar & StatusBar → show navigation bar
– Once the navigation bar is enabled, the next step is to check the Internet connection on the device. All devices will have the latest version by default, and do not require any update.
-
To check Internet connection, click on the circle button in the bottom.
-
Swipe up on the screen and launch the Chrome Application.
-
Type the following URL as shown below:
i. https://api.certify.me/
ii. https://www.ezmdm.com/
iii. If these webpages are loading and you’re able to see them, it is a confirmation that the Internet connection is working fine. You will have to unplug and plug back the device. After the reboot, the device should be back online. It may take around 10 mins to happen as the status is updated every 10 mins. -
If you do not see these websites and see a message link “No internet” or “Some error occurred”, it indicates that something is wrong with the internet on the device. The common reasons why this happens are:
i. The device has no internet connection
ii. The internet signal is fluctuating.
iii. Wi-Fi signal strength is weak on the device
iv. These websites are blocked by the network administrator. -
Once the internet is fixed on the device, we just need to reboot once and the device is good to go.


